Configuring Job Plan
A job plan is a detailed set of instructions outlining the tasks, and resources necessary to complete a specific maintenance activity. Job plans are crucial for maintaining asset reliability, minimizing downtime, ensuring worker safety, and complying with regulatory requirements. They provide a structured and organized approach to execute maintenance tasks, which ultimately contributes to the efficiency and effectiveness of an organization's maintenance operations. The application allows you to associate job plans with maintenance activities while creating the work orders.
Creating Job Plan
Job plan is essential for ensuring the completion of maintenance tasks. These plans offer a systematic framework for handling work orders and framing the necessary steps for each task.
To create a job plan,
Navigate to the Job Plan section. All the existing job plans are displayed by default, as shown below.
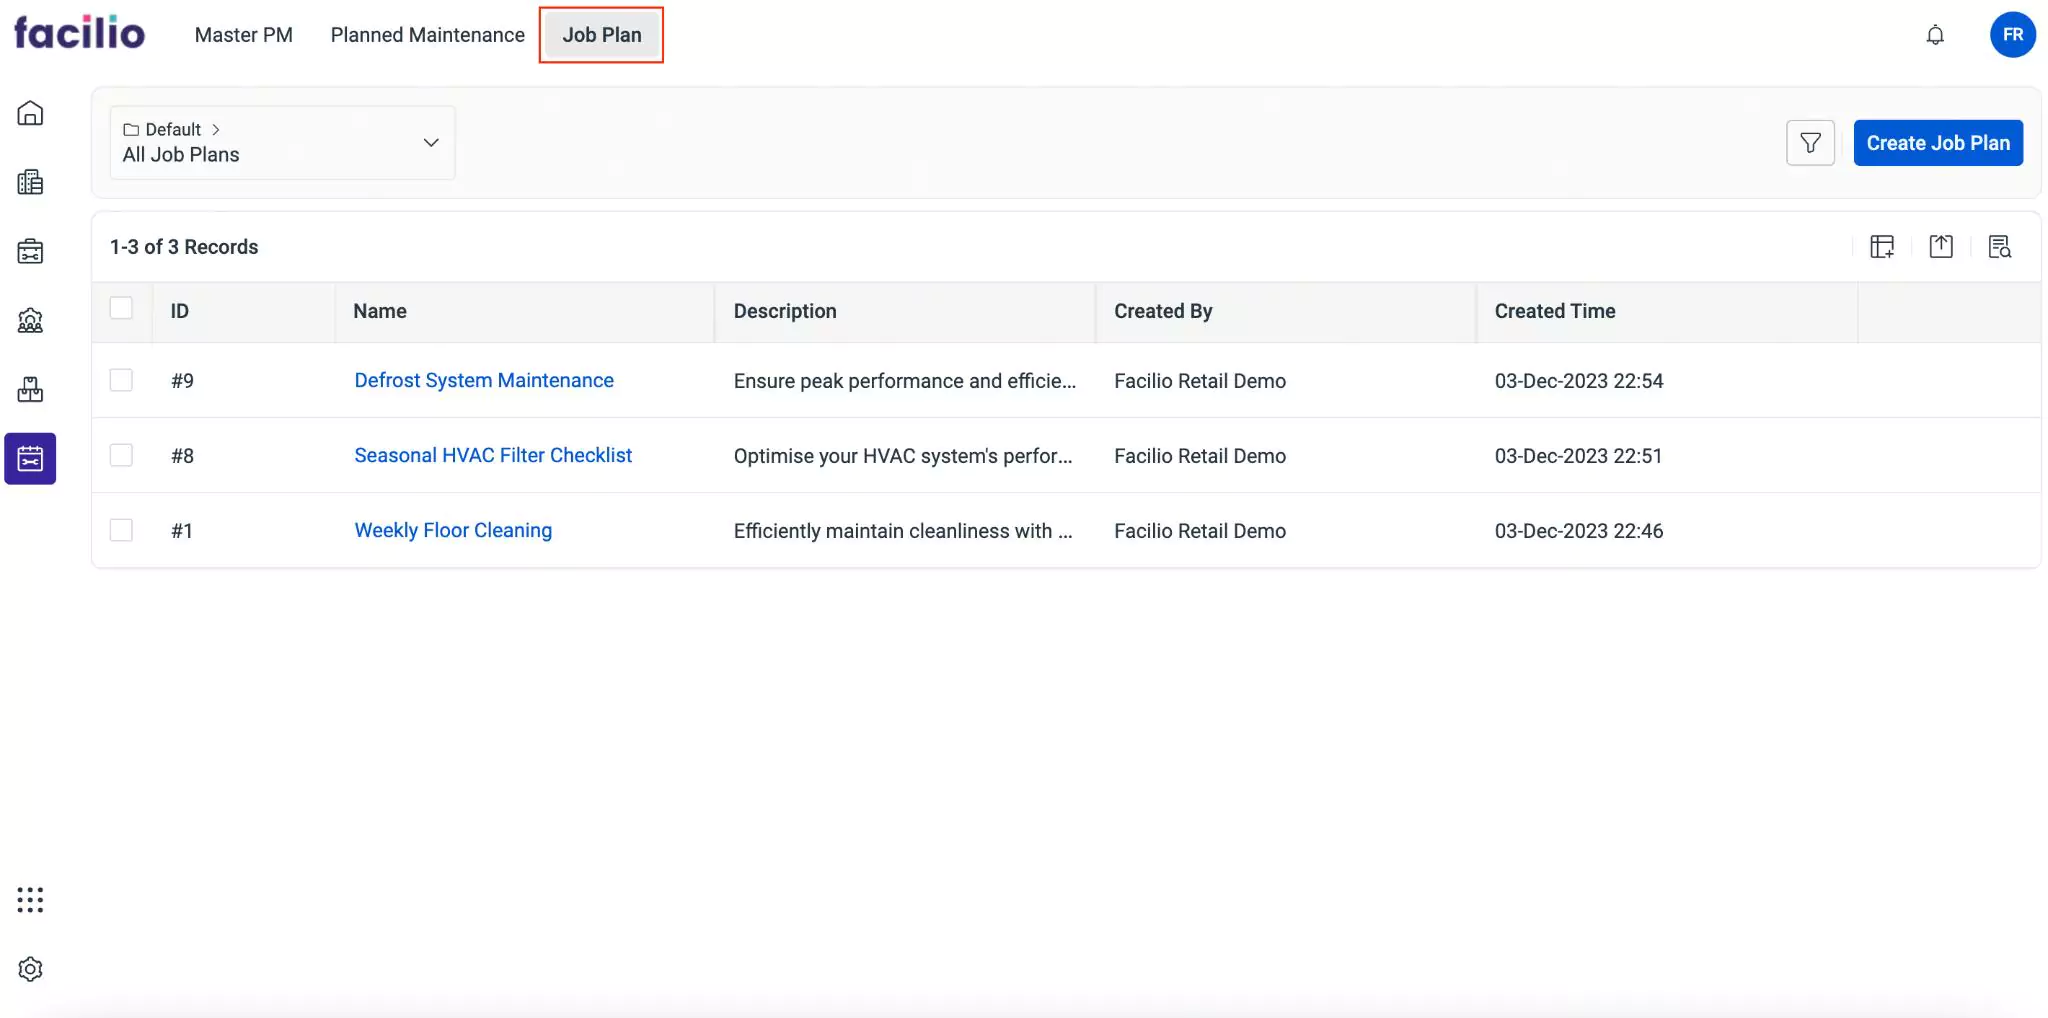
Click Create Job Plan. The screen to create a Job Plan appears.
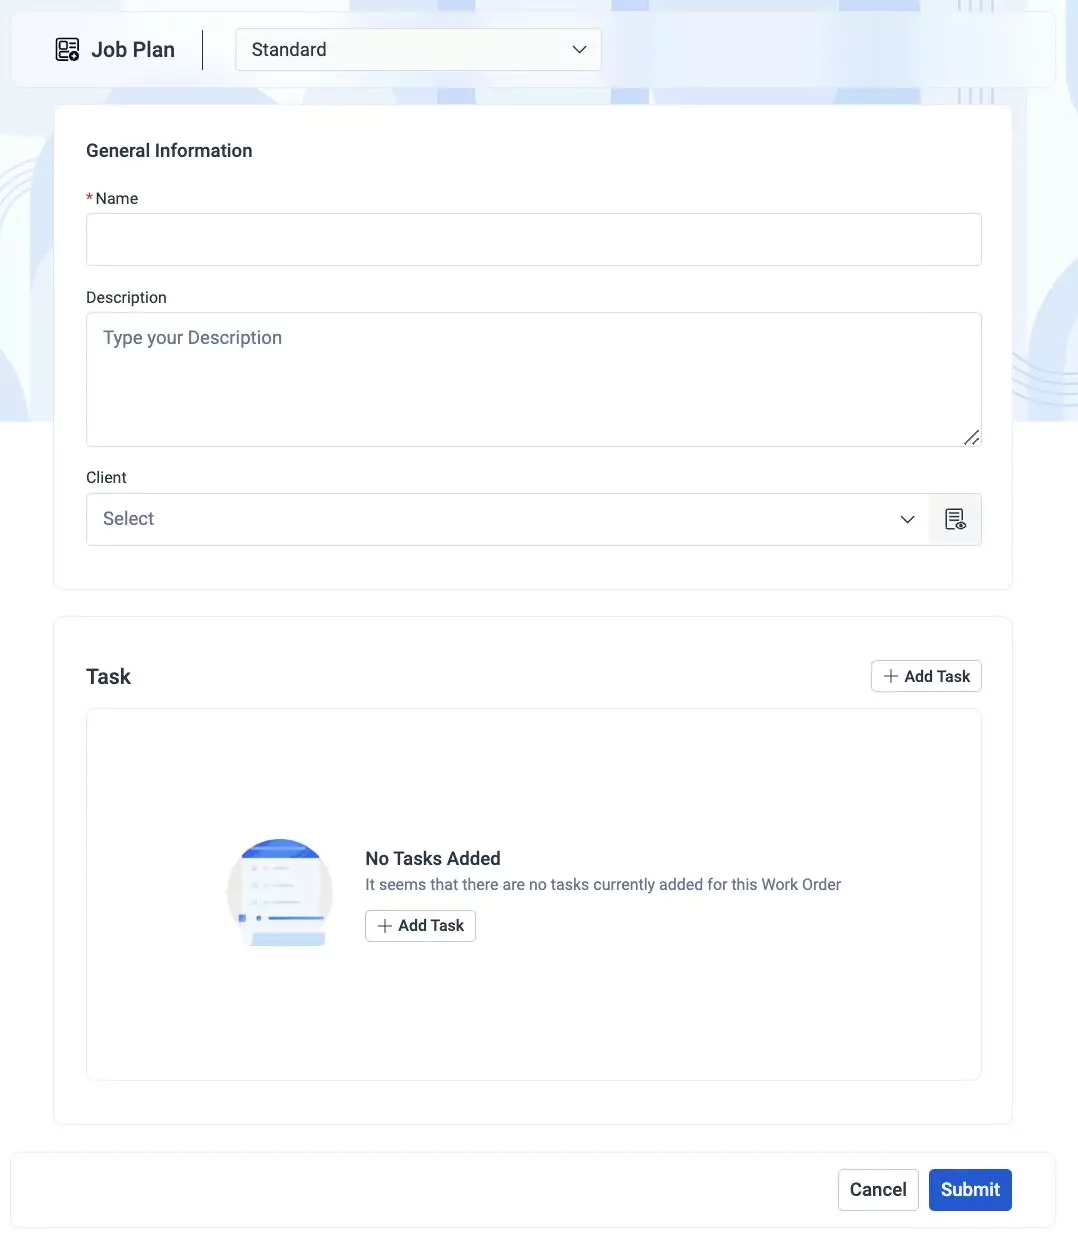
Update the following fields on the screen:
- Name - A label to identify the job plan template
- Description - A short note explaining the purpose of the job plan
- Client - The entity for which the job plan is being created
- Tasks - Specific actions to be performed to complete a work order. Read the Adding a Task section for details on adding and customizing tasks.
Click Submit. The job plan is created successfully.
Adding a Task
The Task section provides a job plan required for accomplishing the work order. This section allows you to add items, tools and services associated with the work order. Items are physical objects or materials required to complete the tasks outlined in the work order. For instance, if the work order involves repairing a machine, the items needed might include replacement parts or components. Tools are the equipment or instruments necessary for task execution, enabling workers to perform their duties effectively and efficiently. This may encompass specialized tools specific to the task at hand. Services refer to any external assistance or expertise necessary for work order completion. This could involve hiring contractors, outsourcing tasks, or obtaining specialized services such as technical support.
Additionally, you can also add task code, work type, and skills required for completing the work order. A task code serves as a unique identifier assigned to each specific task within a work order, facilitating the tracking and order of execution. The work type categorizes the nature of the task to be performed and provides information on required tools, items and related services. Skills refer to the specific qualifications needed to complete the task outlined in the work order, including technical skills or specialized knowledge required for effective task performance.
To add a Task,
Click Add Task. The Create Task Window appears as shown below.
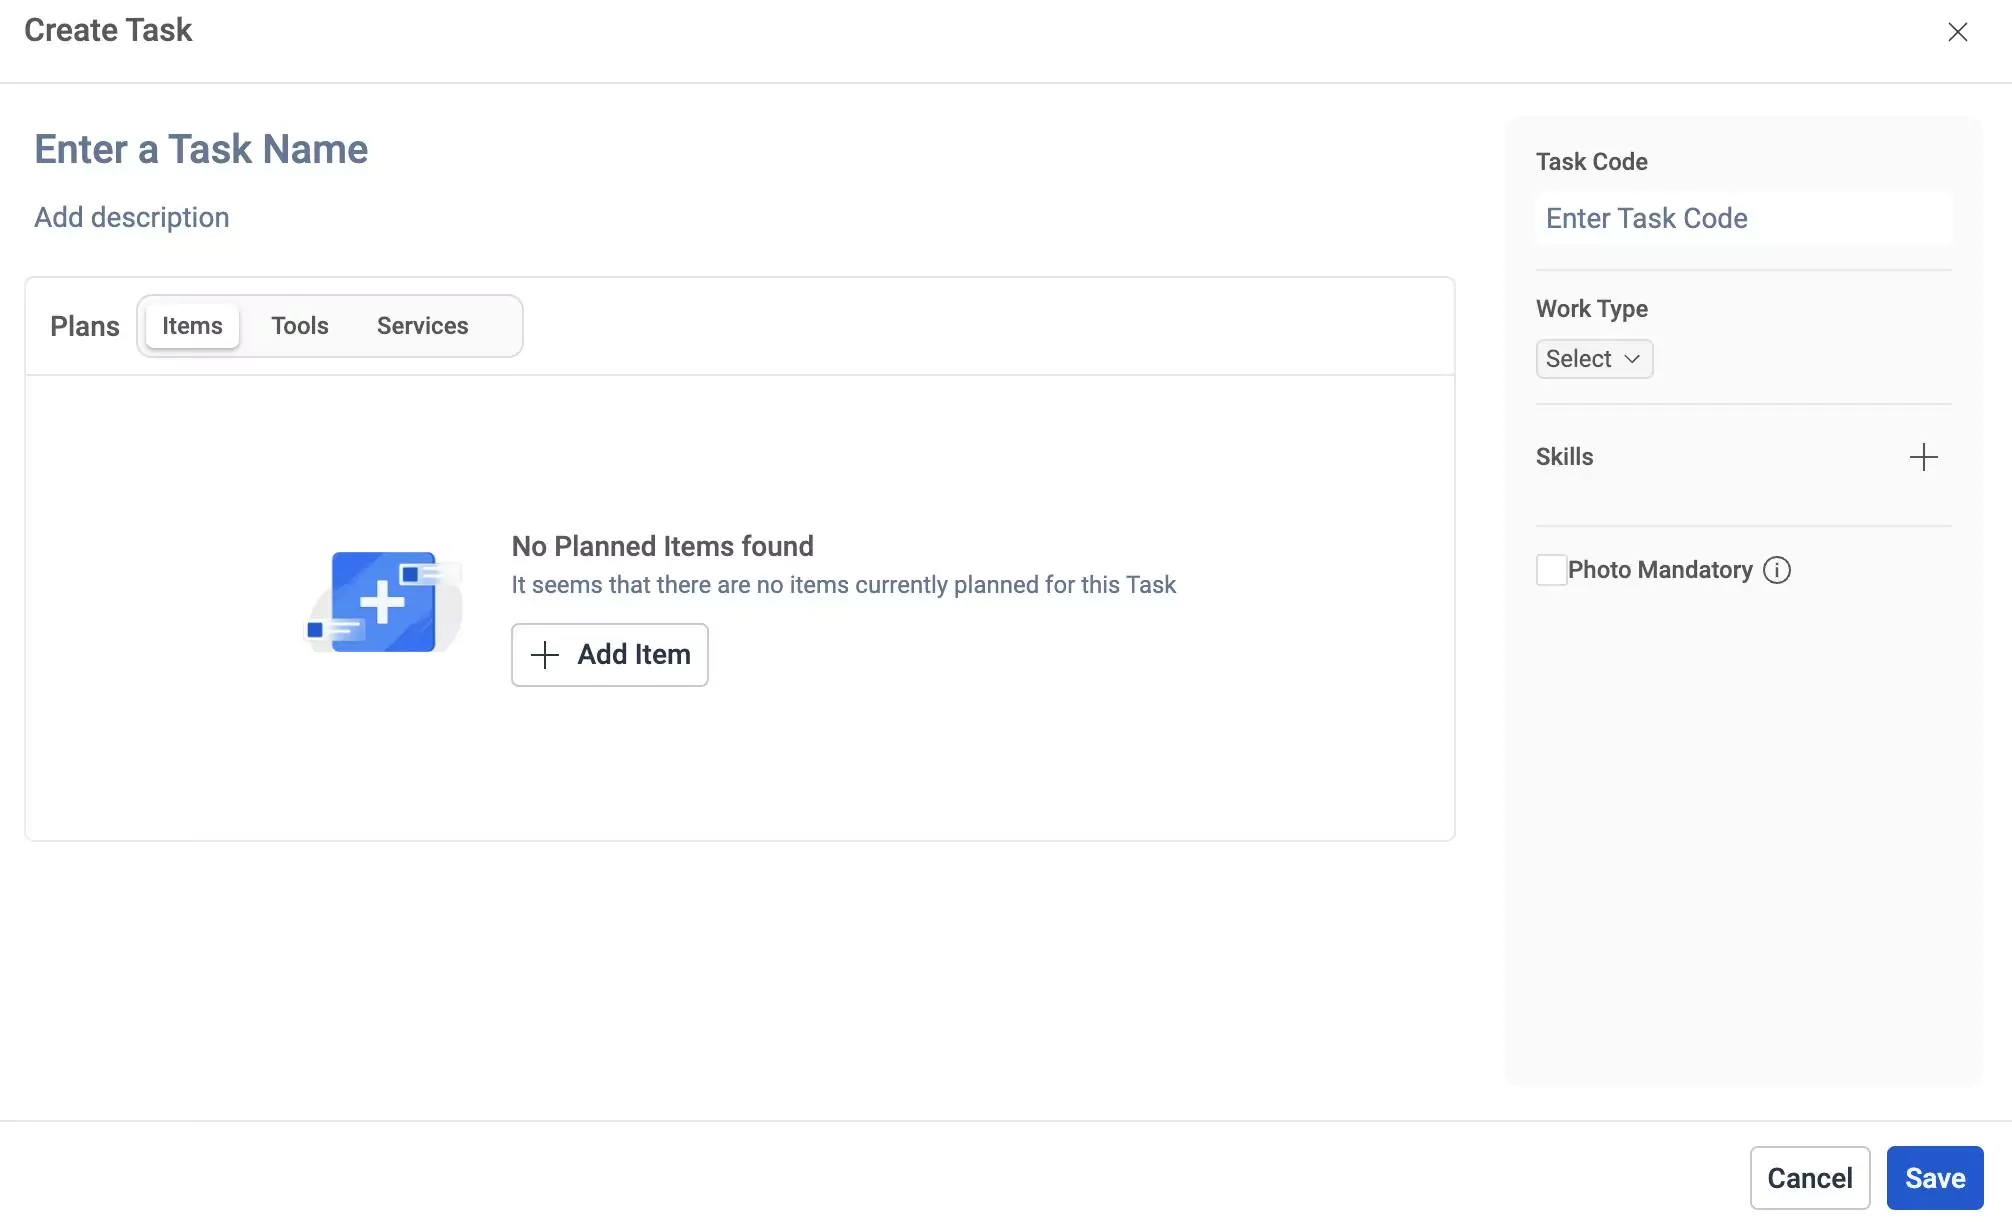
Enter the task name and description in the respective tabs.
Click button to add items. The Choose Item window appears.
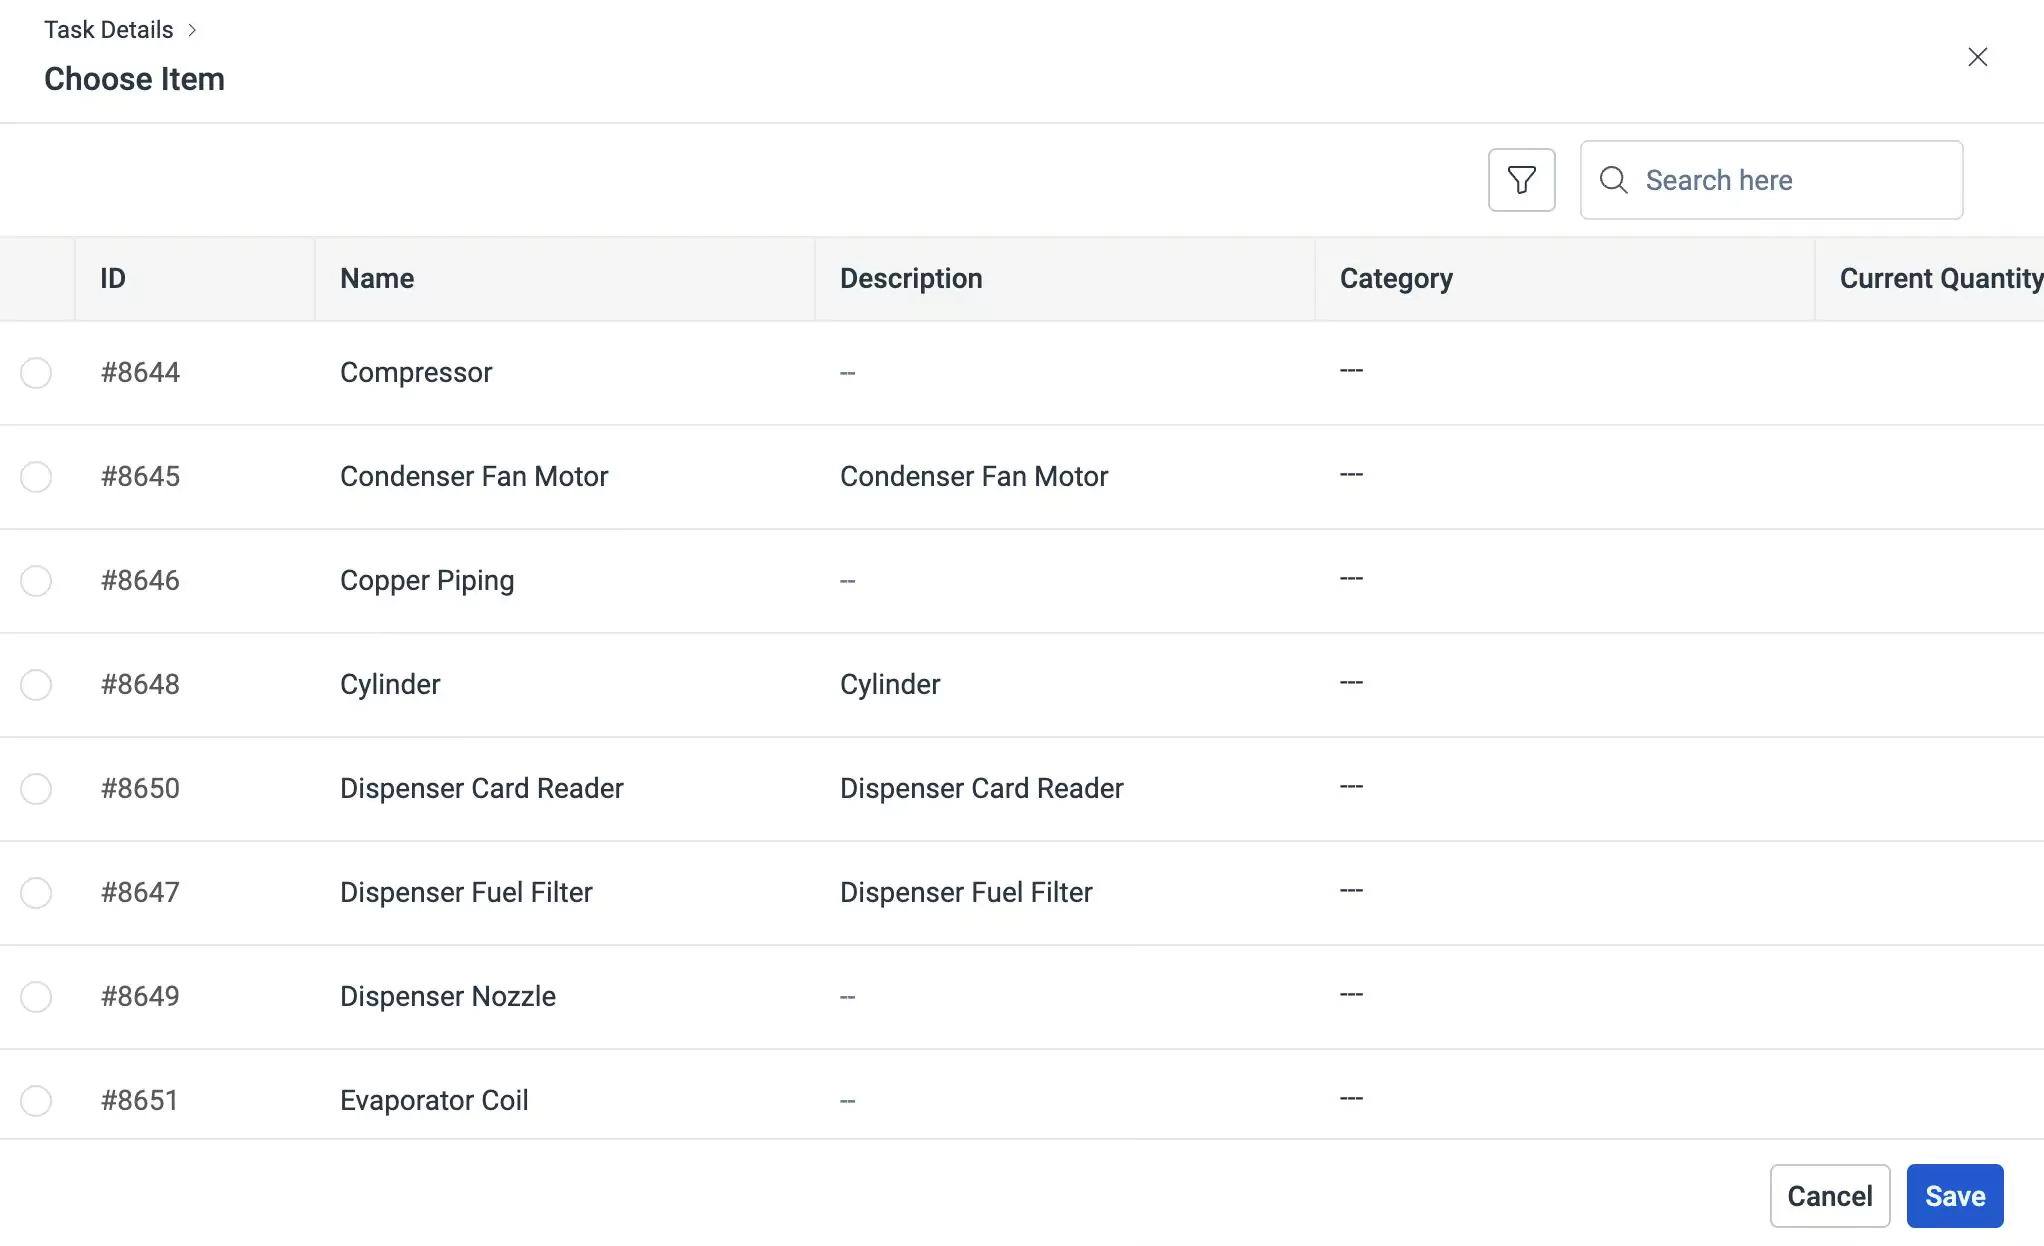
Select an Item and click Save. The screen to add items appears.
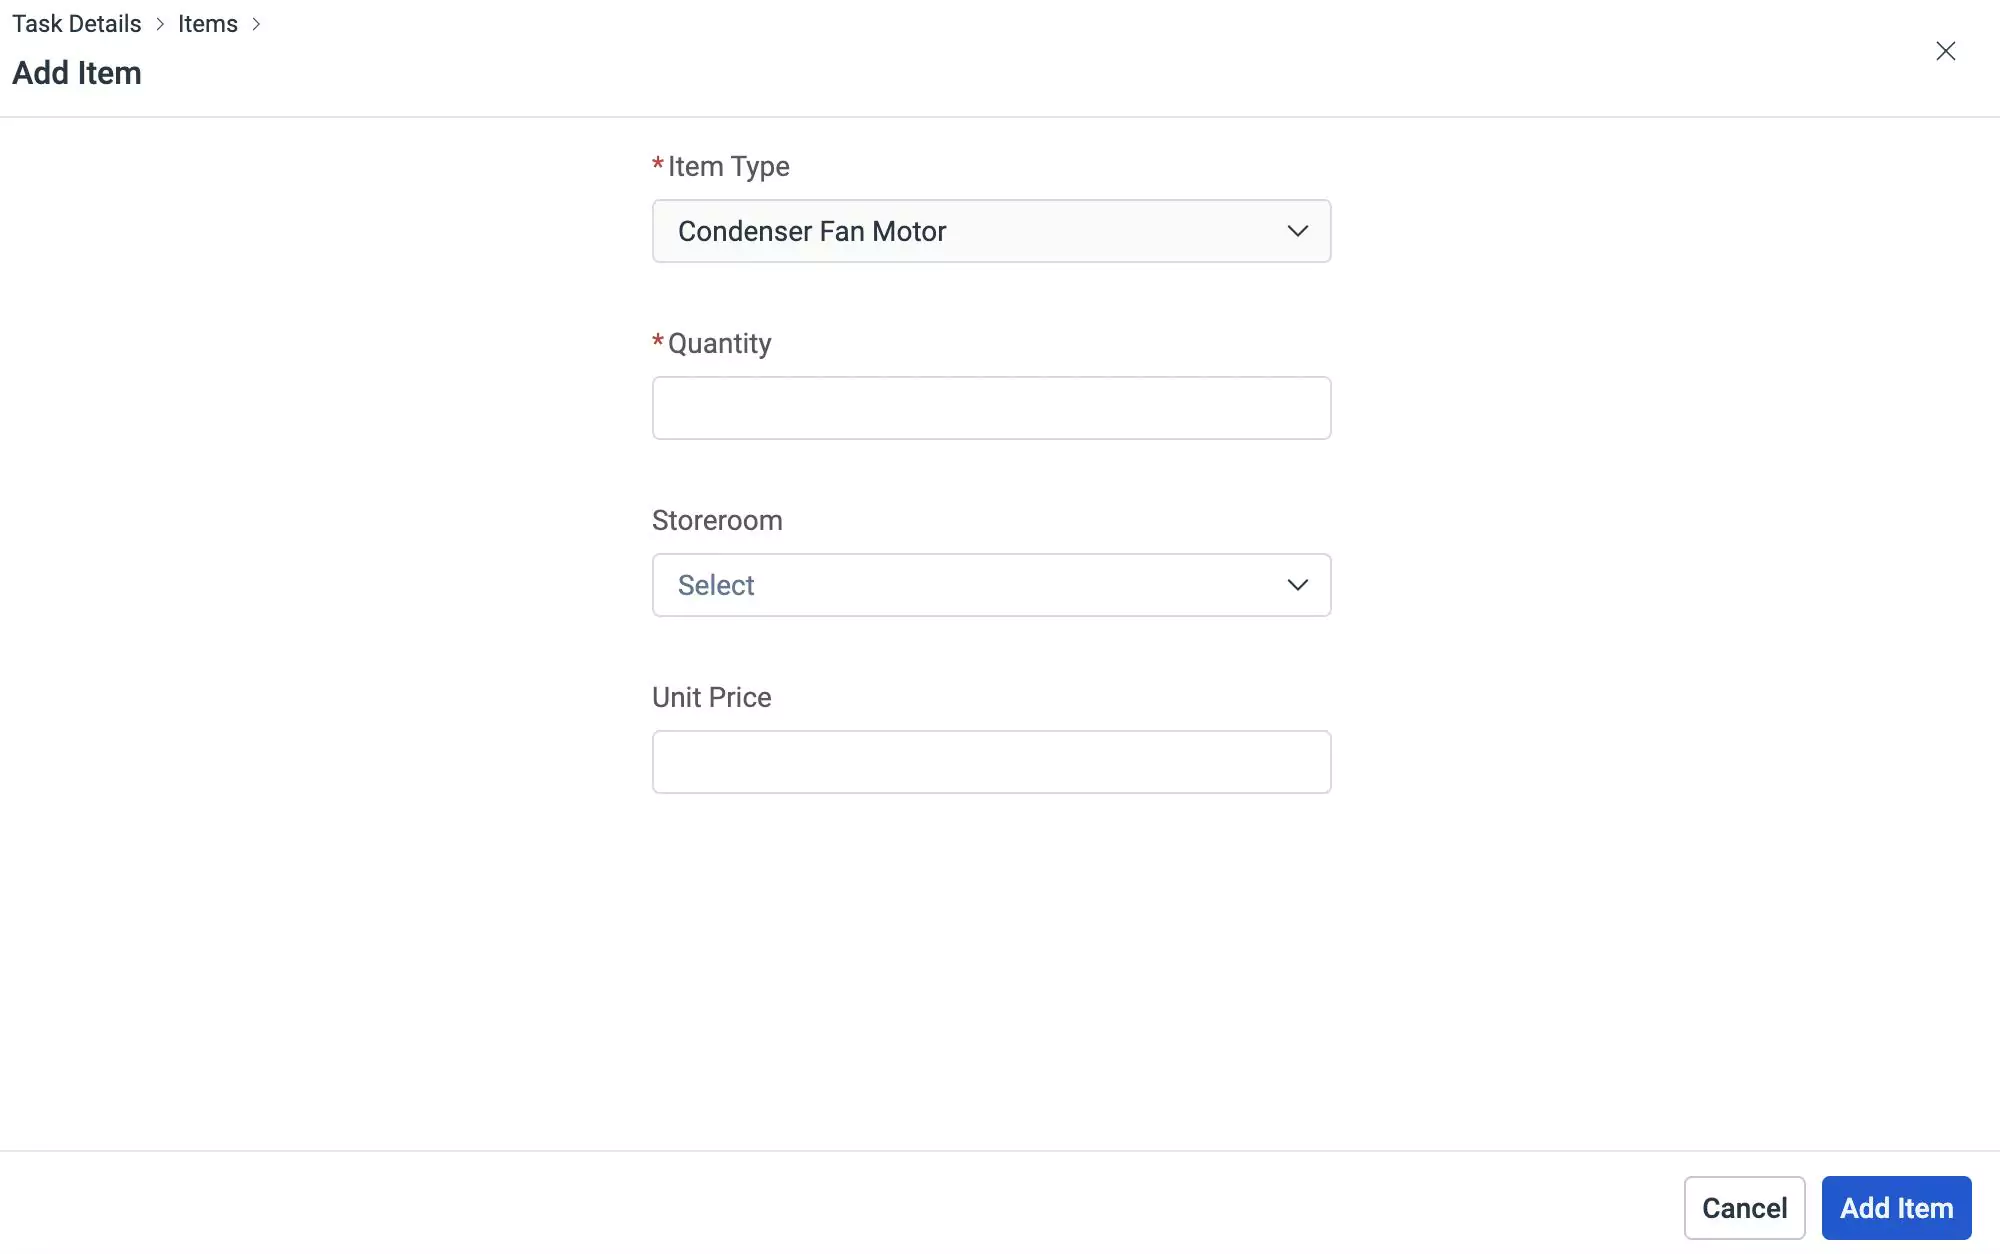
Enter the required details and click Add Item. It is mandatory to fill in the Quantity field before adding an Item. The item is added successfully as shown below.
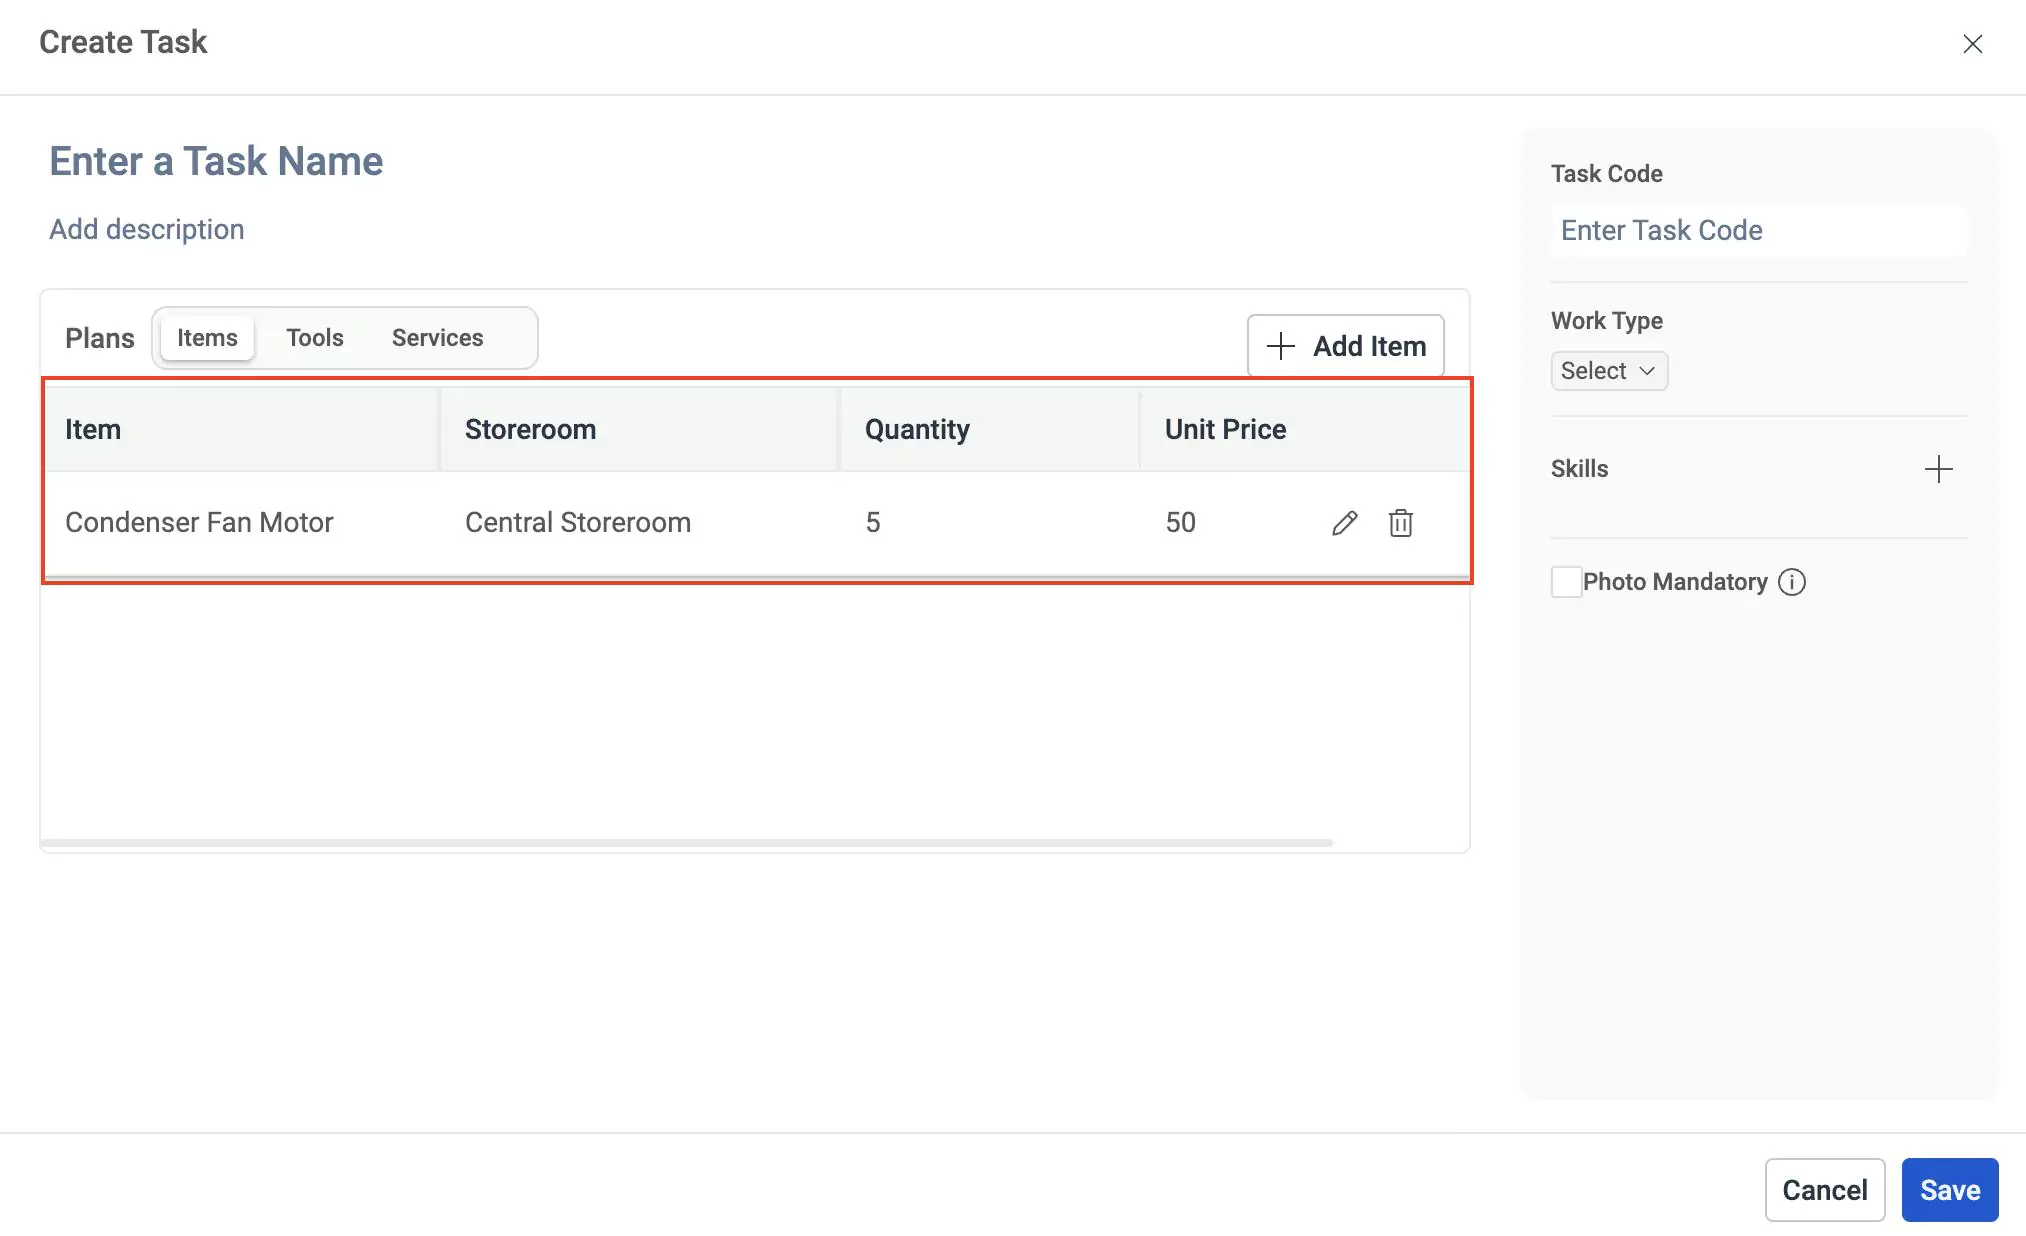
You can click and icons to edit and delete the record respectively.
Similarly, you can add tools and services by clicking on the Tools and Services sections.
Enter the task code in the Task Code section.
Click button in the Work Type section to select a work type from the available list.
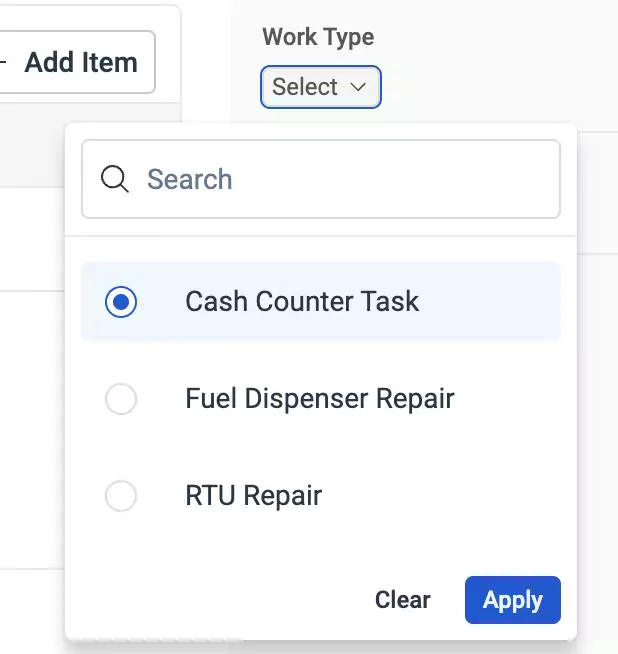
Click Apply or Clear to apply or clear the work type, respectively.
Note: When you apply a work type and if there is an existing record in planned inventory, services, and skills the following warning screen will appear.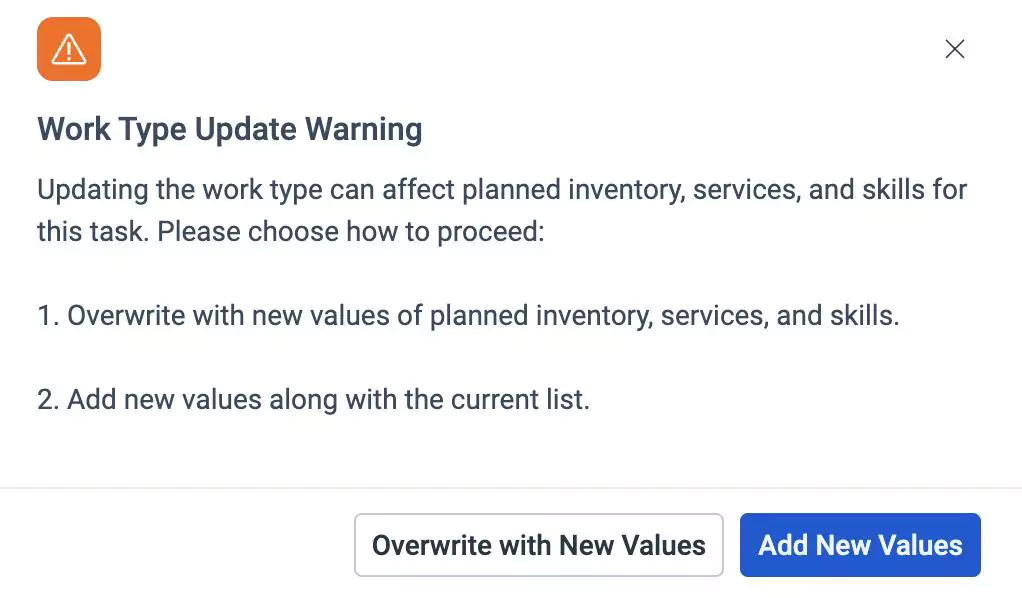
You can perform any of the following actions:
- Overwrite the planned inventory, services, and skills section with the values in the selected work type template by clicking on the Overwrite with New Values
- Add the values of the selected work type template to the existing record in the planned inventory, services, and skills section by clicking Add New Values
Click icon in the Skills section to add the skills required for the task. Select the required skills and click Apply.
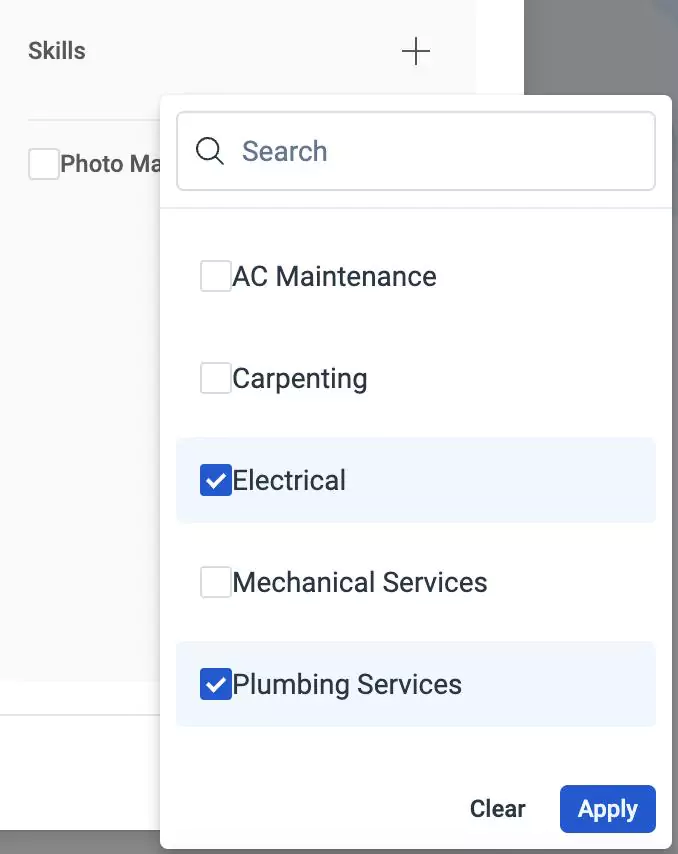
You can select multiple skills for a particular task. Click Clear to remove or clear the skills.
Enable the Photo Mandatory checkbox to make attaching images mandatory for the task.
Click Save. The task is updated successfully.
Viewing Job Plan
You can view the details of the job plans by navigating to the Job Plan section and clicking on the job plan name. Upon clicking on a job plan, the details screen appears, as shown below.
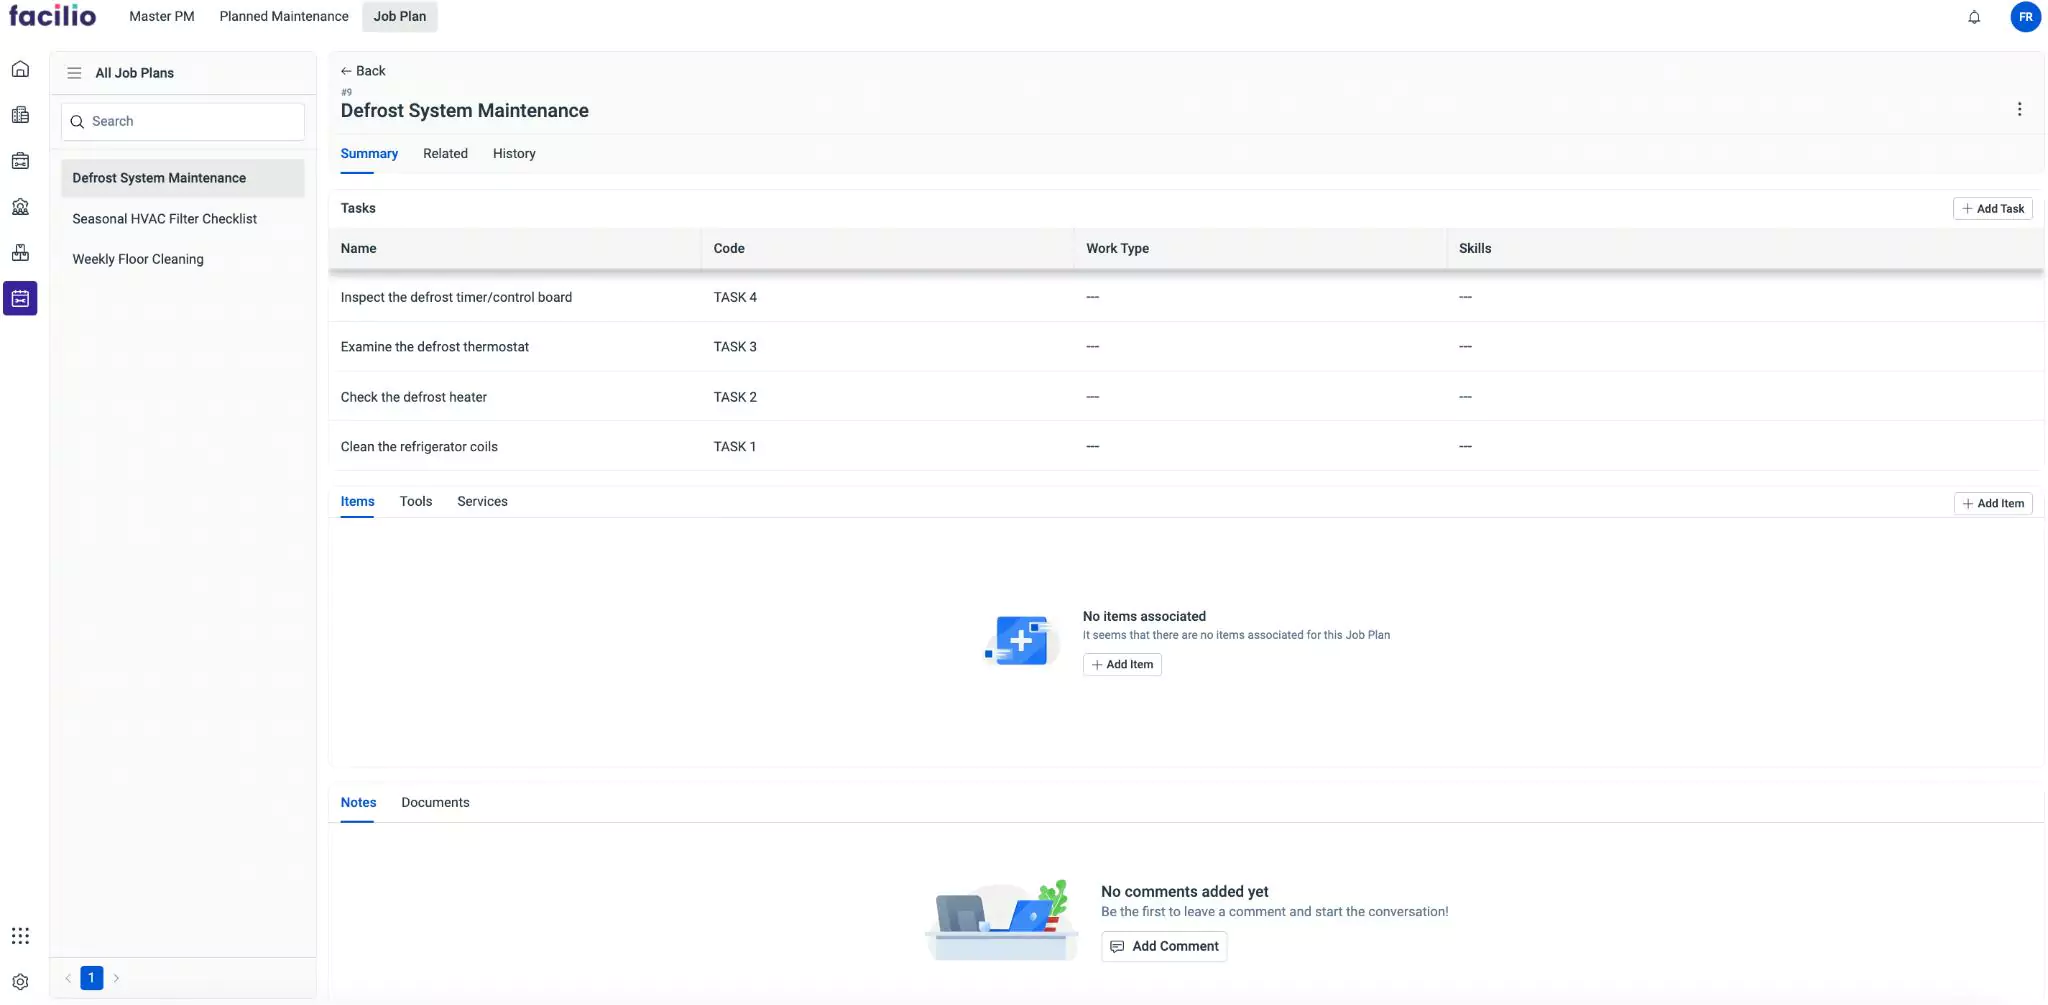
The job plan details are grouped under the following sections.
Summary
The Summary section displays the overall basic information of the job plan. It includes details such as the tasks record, items, tools, and services. Moreover, you can also add tasks, items, tools, and services from this section. You can also add Notes and attach relevant Documents to include additional information.
Related
The Related section displays the list view of other records related to the job plan across the modules.
History
The History section displays the history of all actions related to the maintenance activity. The recorded information helps you understand the course of action or changes the record has undergone. The displayed details include the action that took place, the user who performed the action, and the date and time of occurrence.
You can click the (vertical ellipsis) icon at the top right corner of the details screen to edit the corresponding details.