Setting up SCIM with Microsoft Entra ID (aka Azure Active Directory)
Introduction
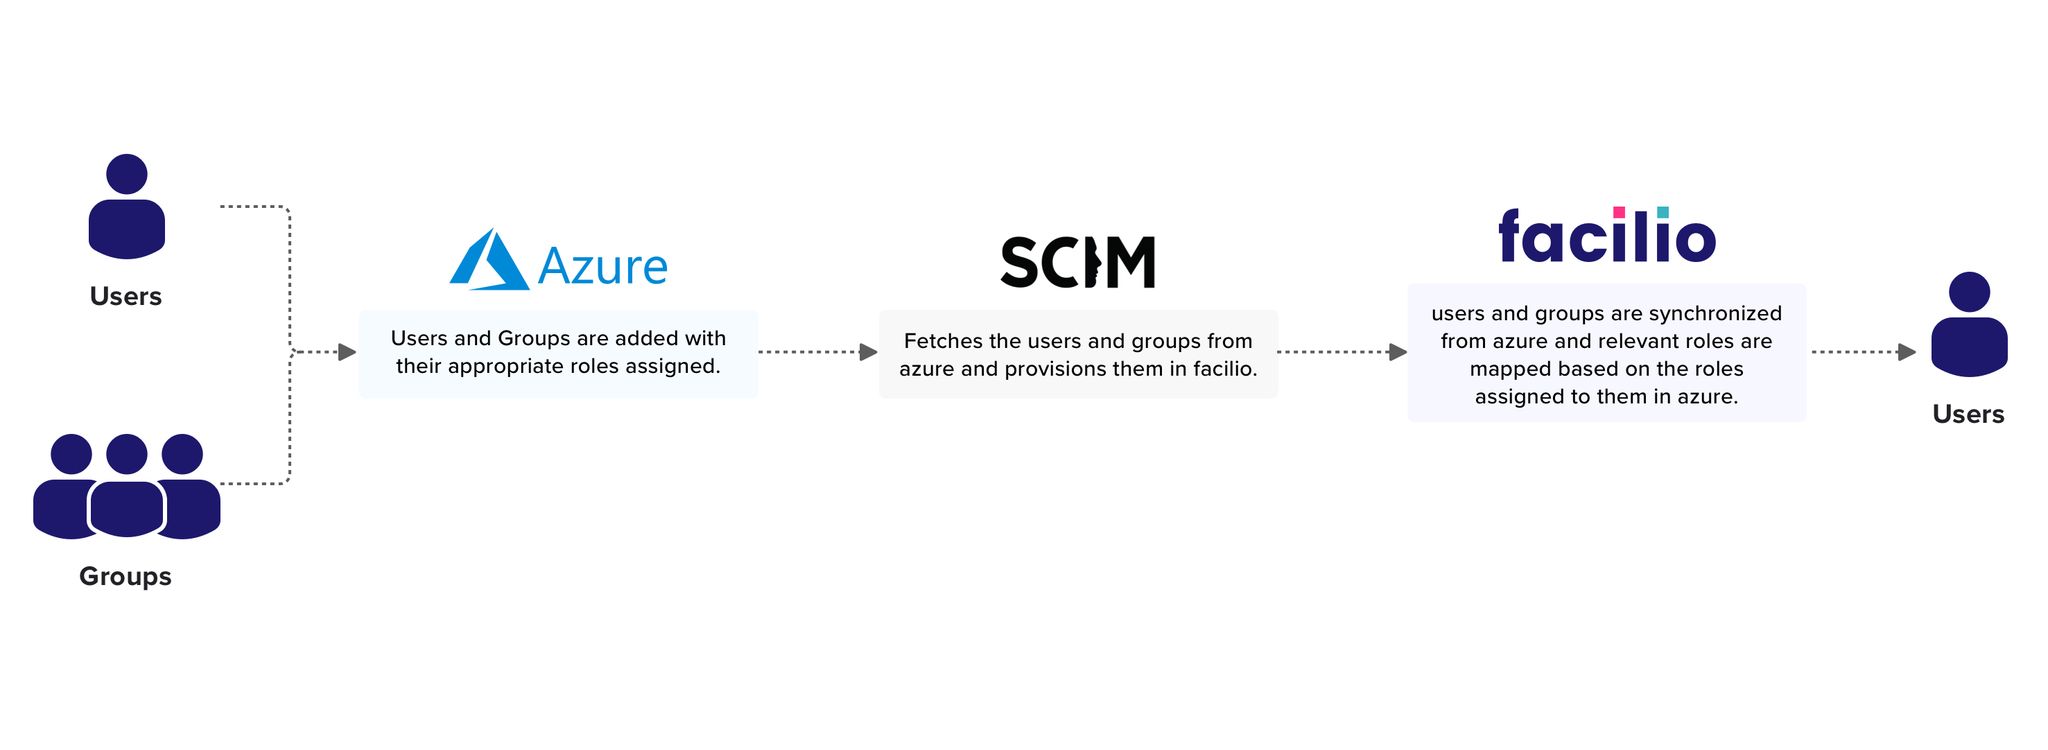
This document provides instructions for integrating Facilio with Azure AD using SCIM 2.0. SCIM (System for Cross-domain Identity Management) is an open standard designed to automate the exchange of user identity information between identity domains or IT systems.
Prerequisites
Before starting the SCIM integration, ensure you have the following:
Facilio administrative access to set up SCIM-based user sync for Azure AD.
An Azure enterprise application created to sync your Azure AD users with your Facilio account.
Setup Process
Request SCIM Secret Token from Facilio
Contact support@facilio.com to generate a SCIM secret token for your account. The Facilio support team will verify your request and provide the token.
Creating a New Enterprise Application in Azure AD
Sign in to Azure Portal: Sign into your Azure Portal as an Administrator and go to Enterprise applications.
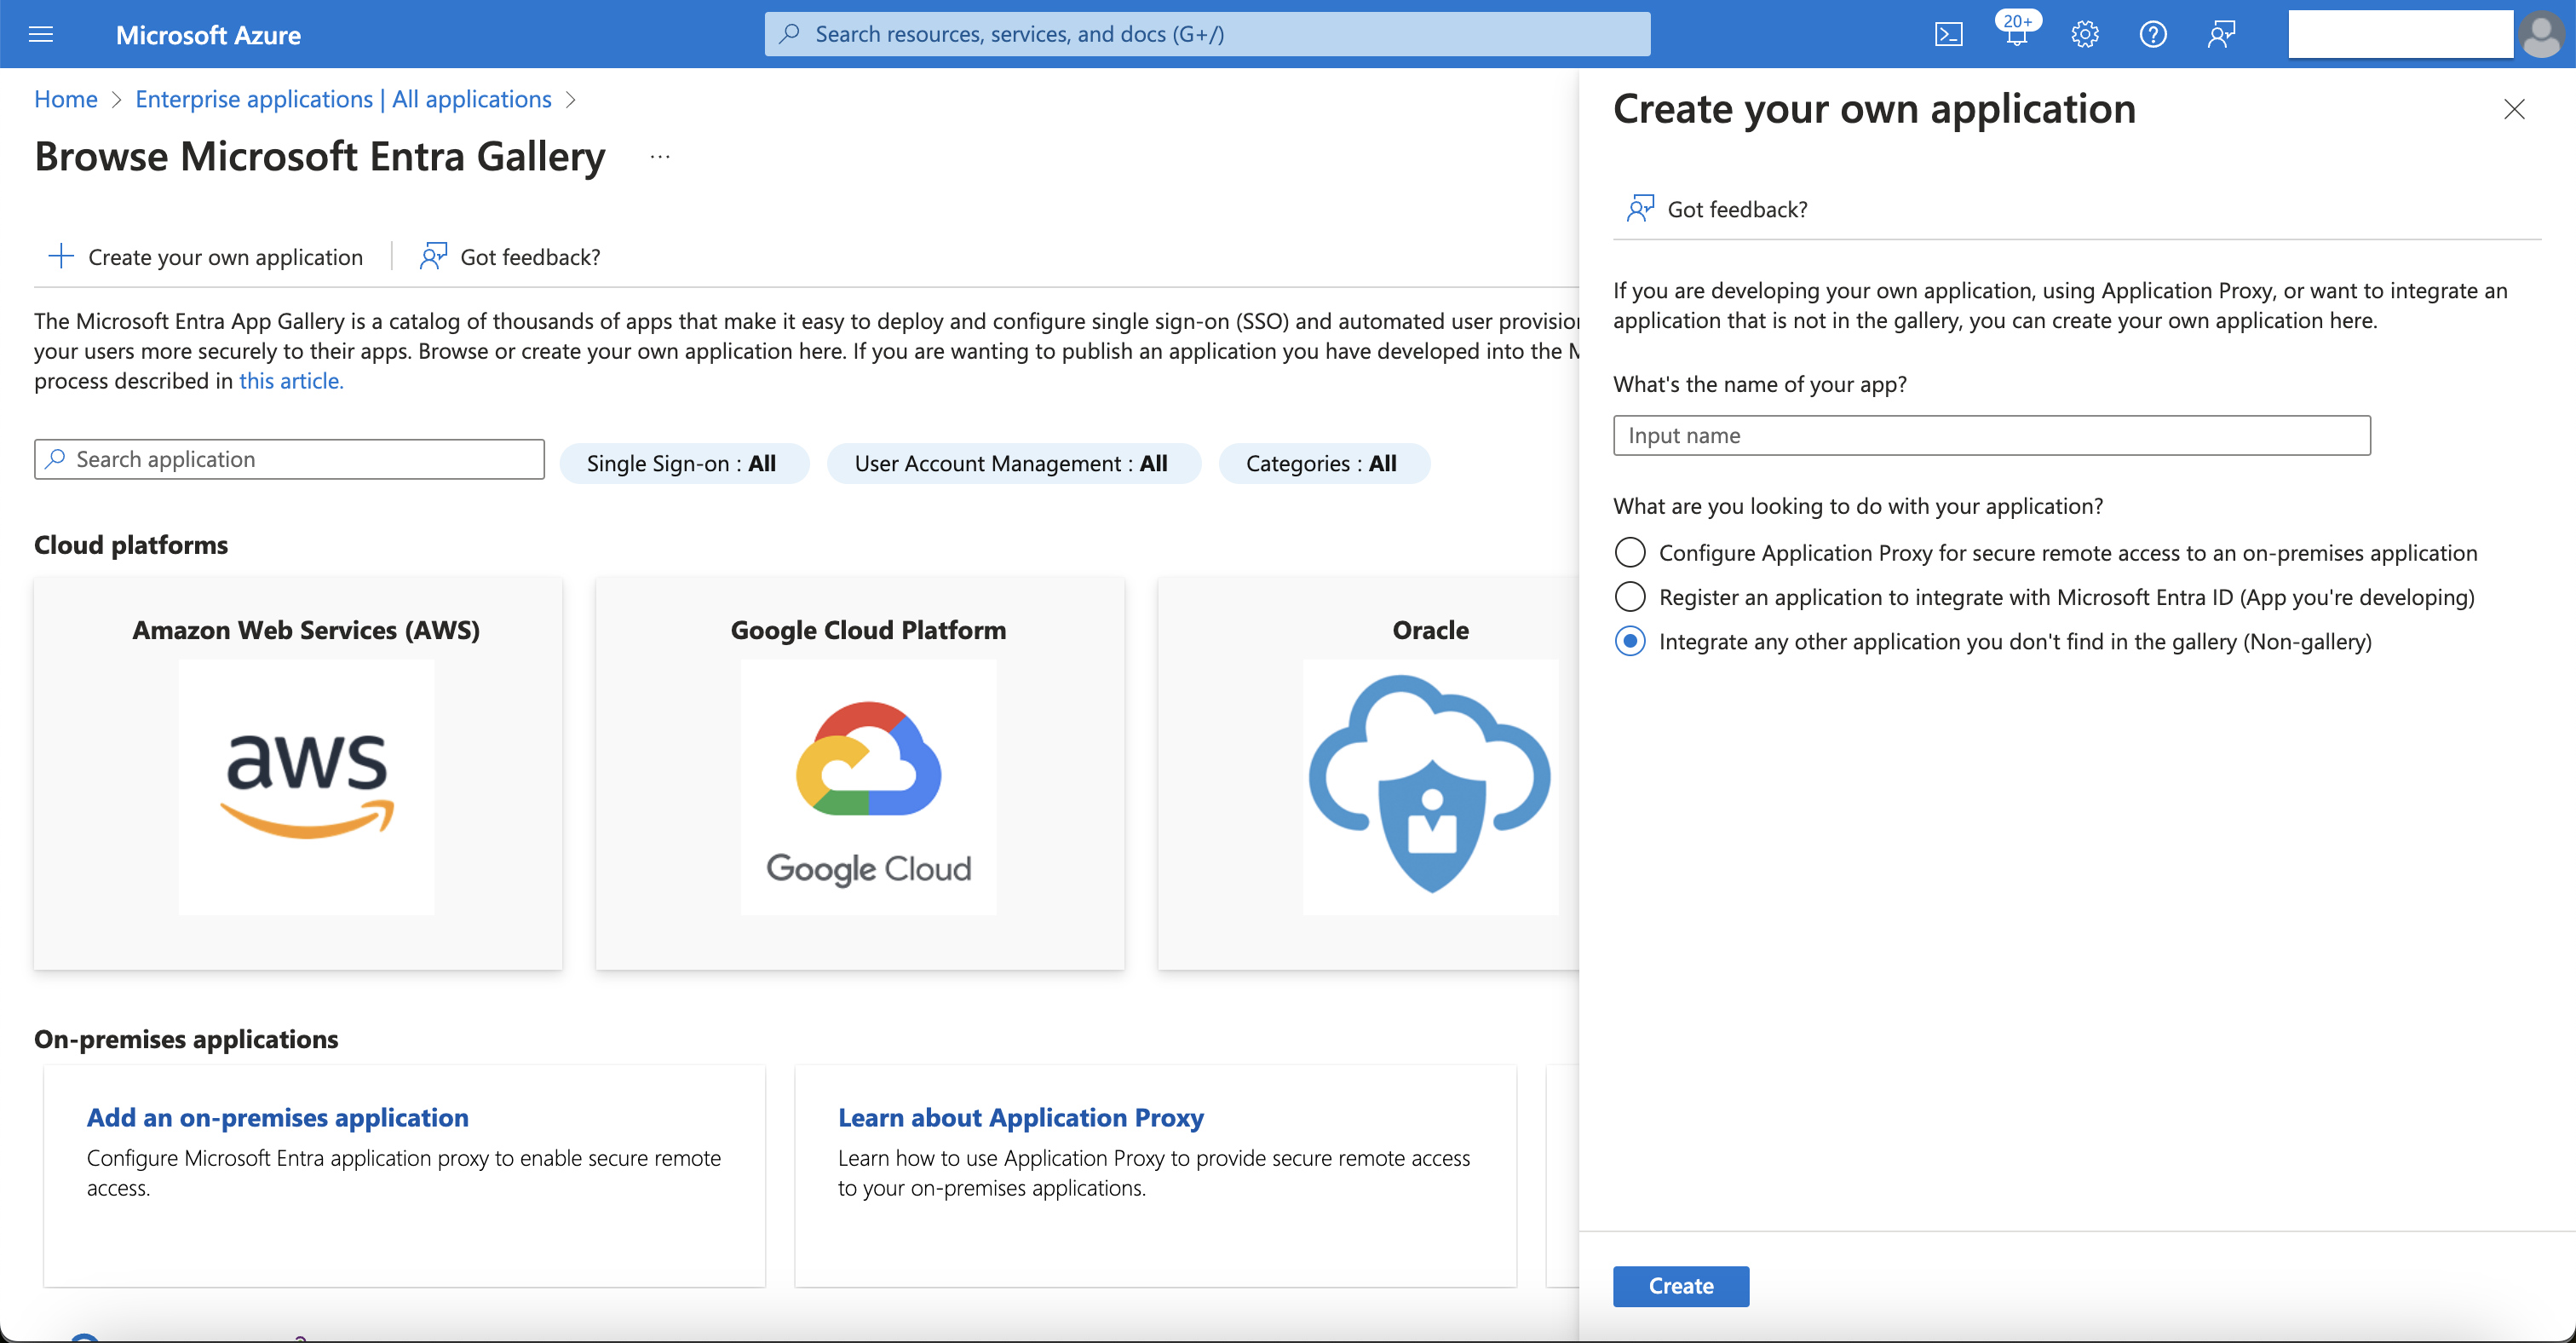
Create a New Enterprise Application:
Select New application and choose Non-gallery application.
Enter a meaningful name for your enterprise app and click Add.
Assign Users to the Azure Enterprise Application:
On your enterprise app's left panel, under Manage, click the Users and groups tab.
Click the + Add user button, then manually select the users and groups you want to sync with your Facilio account.
Click Assign. You can assign multiple AD users and groups to your enterprise app. Only those users and groups assigned to your enterprise app can be provisioned to your Facilio account.
Provisioning Your Enterprise App
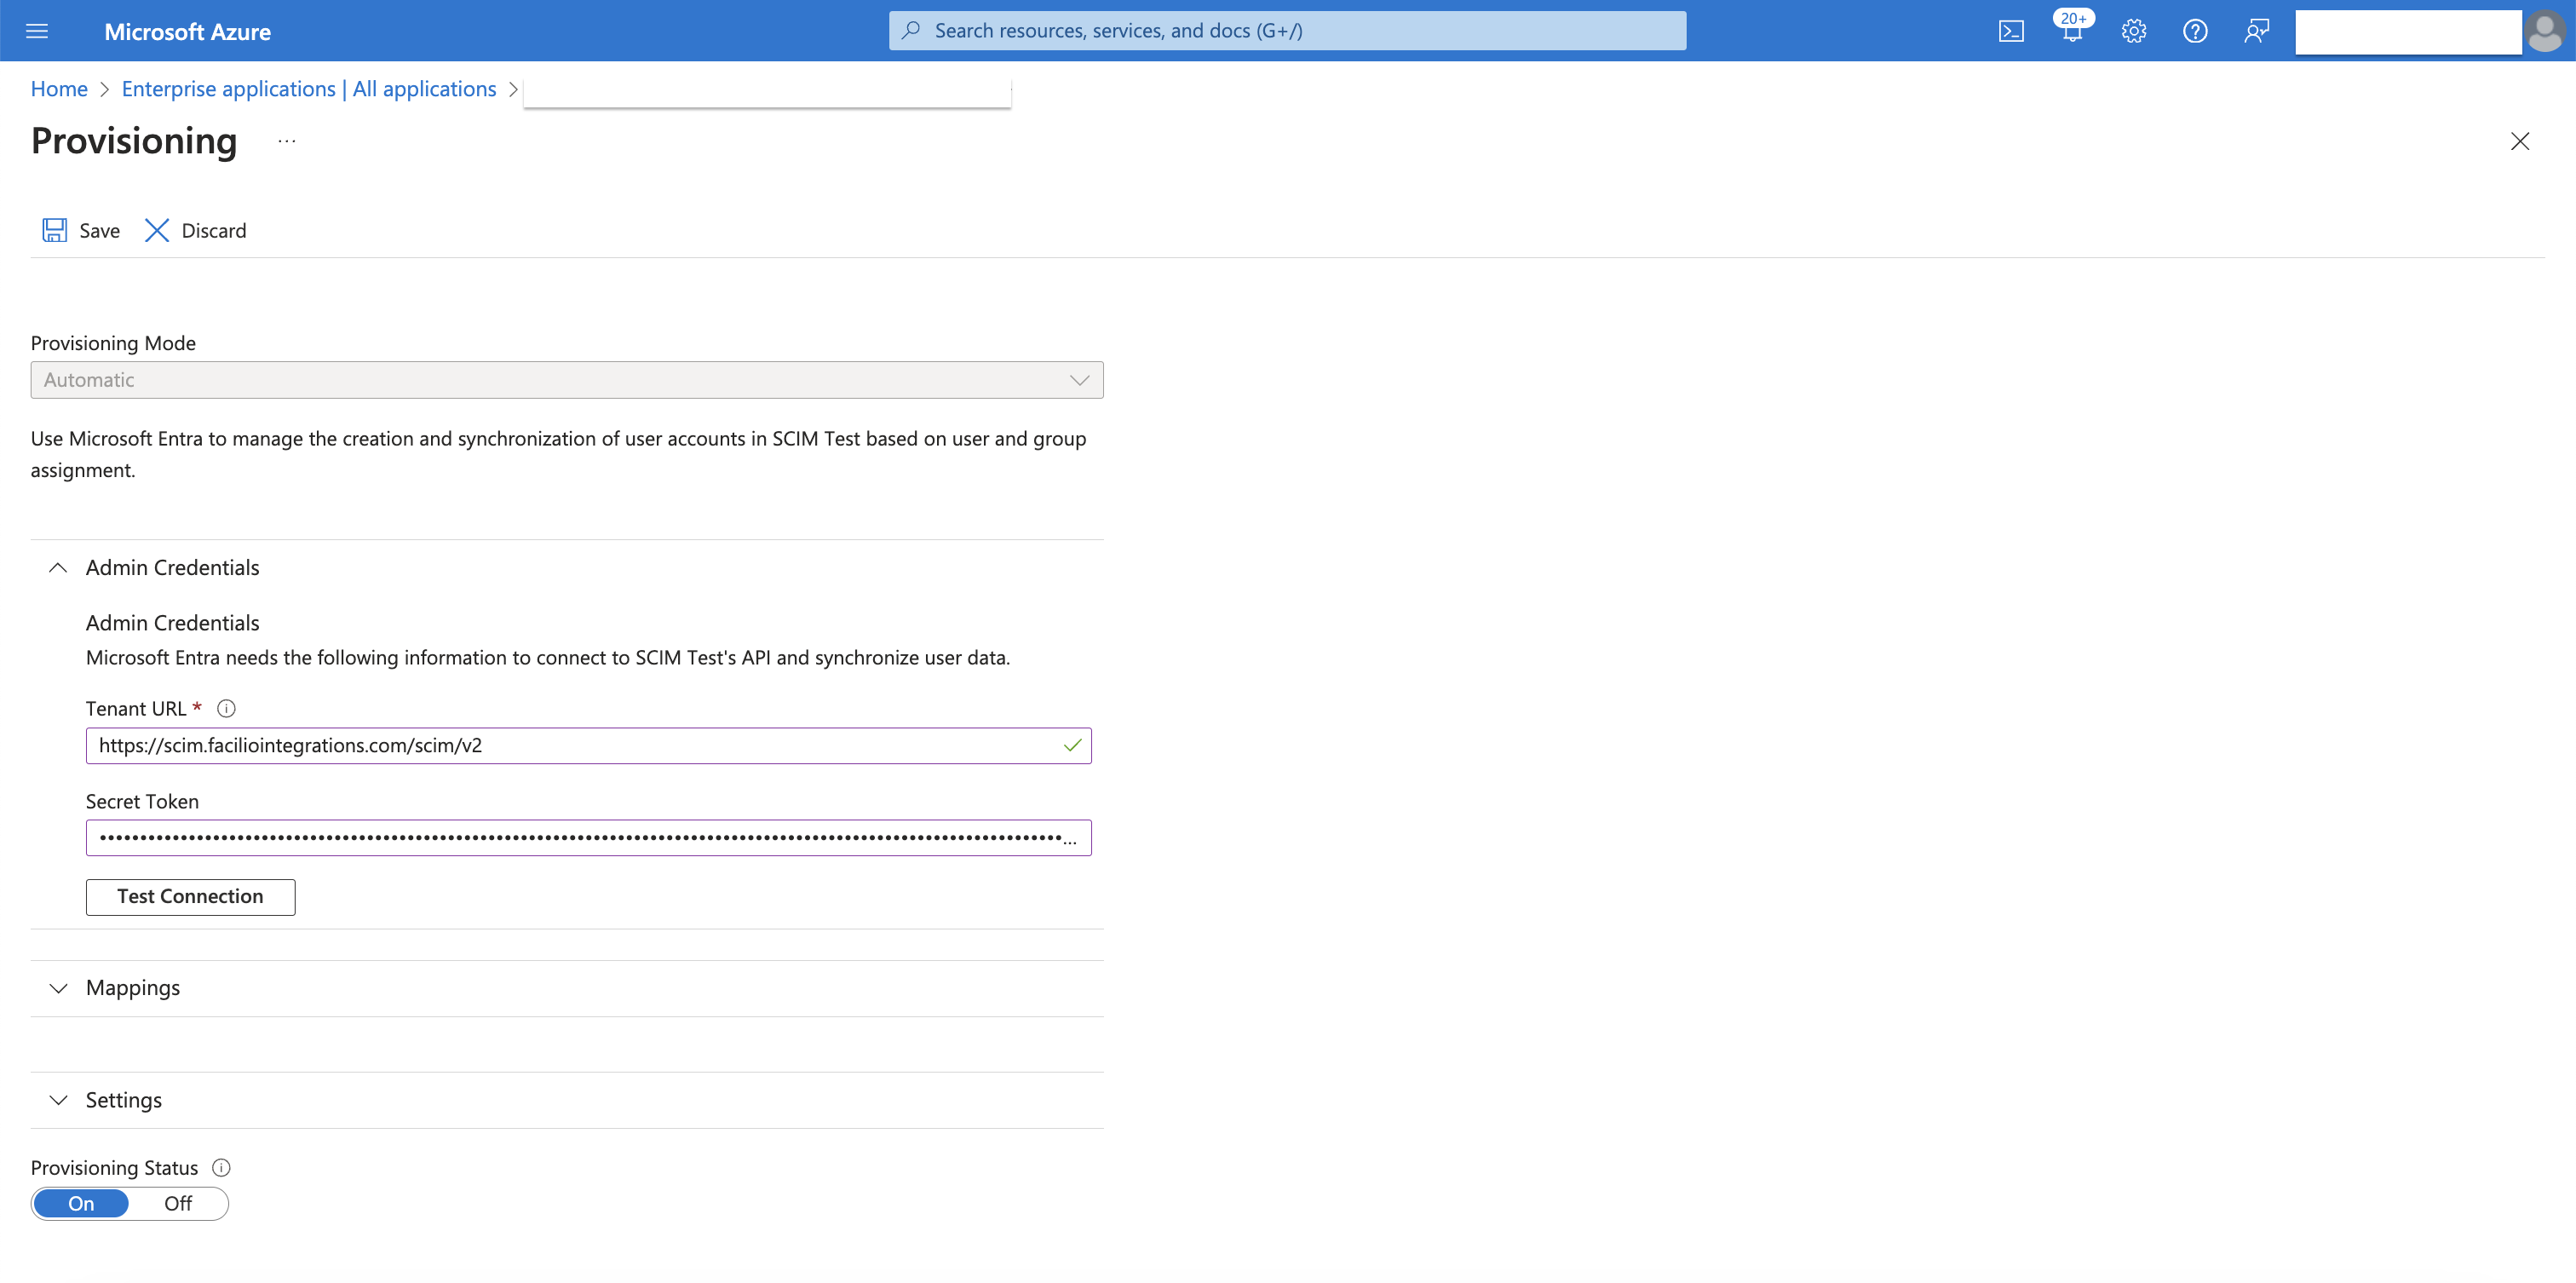
Go to the Provisioning tab in your enterprise app.
From the Provisioning Mode dropdown, select Automatic.
Under Admin Credentials:
Enter the SCIM Endpoint: https://scim.faciliointegrations.com/scim/v2
Enter the Secret Token: Use the token provided by Facilio.
Click Test Connection; a success message should appear.
Click Save at the top of your screen.
Mapping Attributes of AD Users
Under Provisioning > Mappings, click Provision Microsoft Entra ID Users.
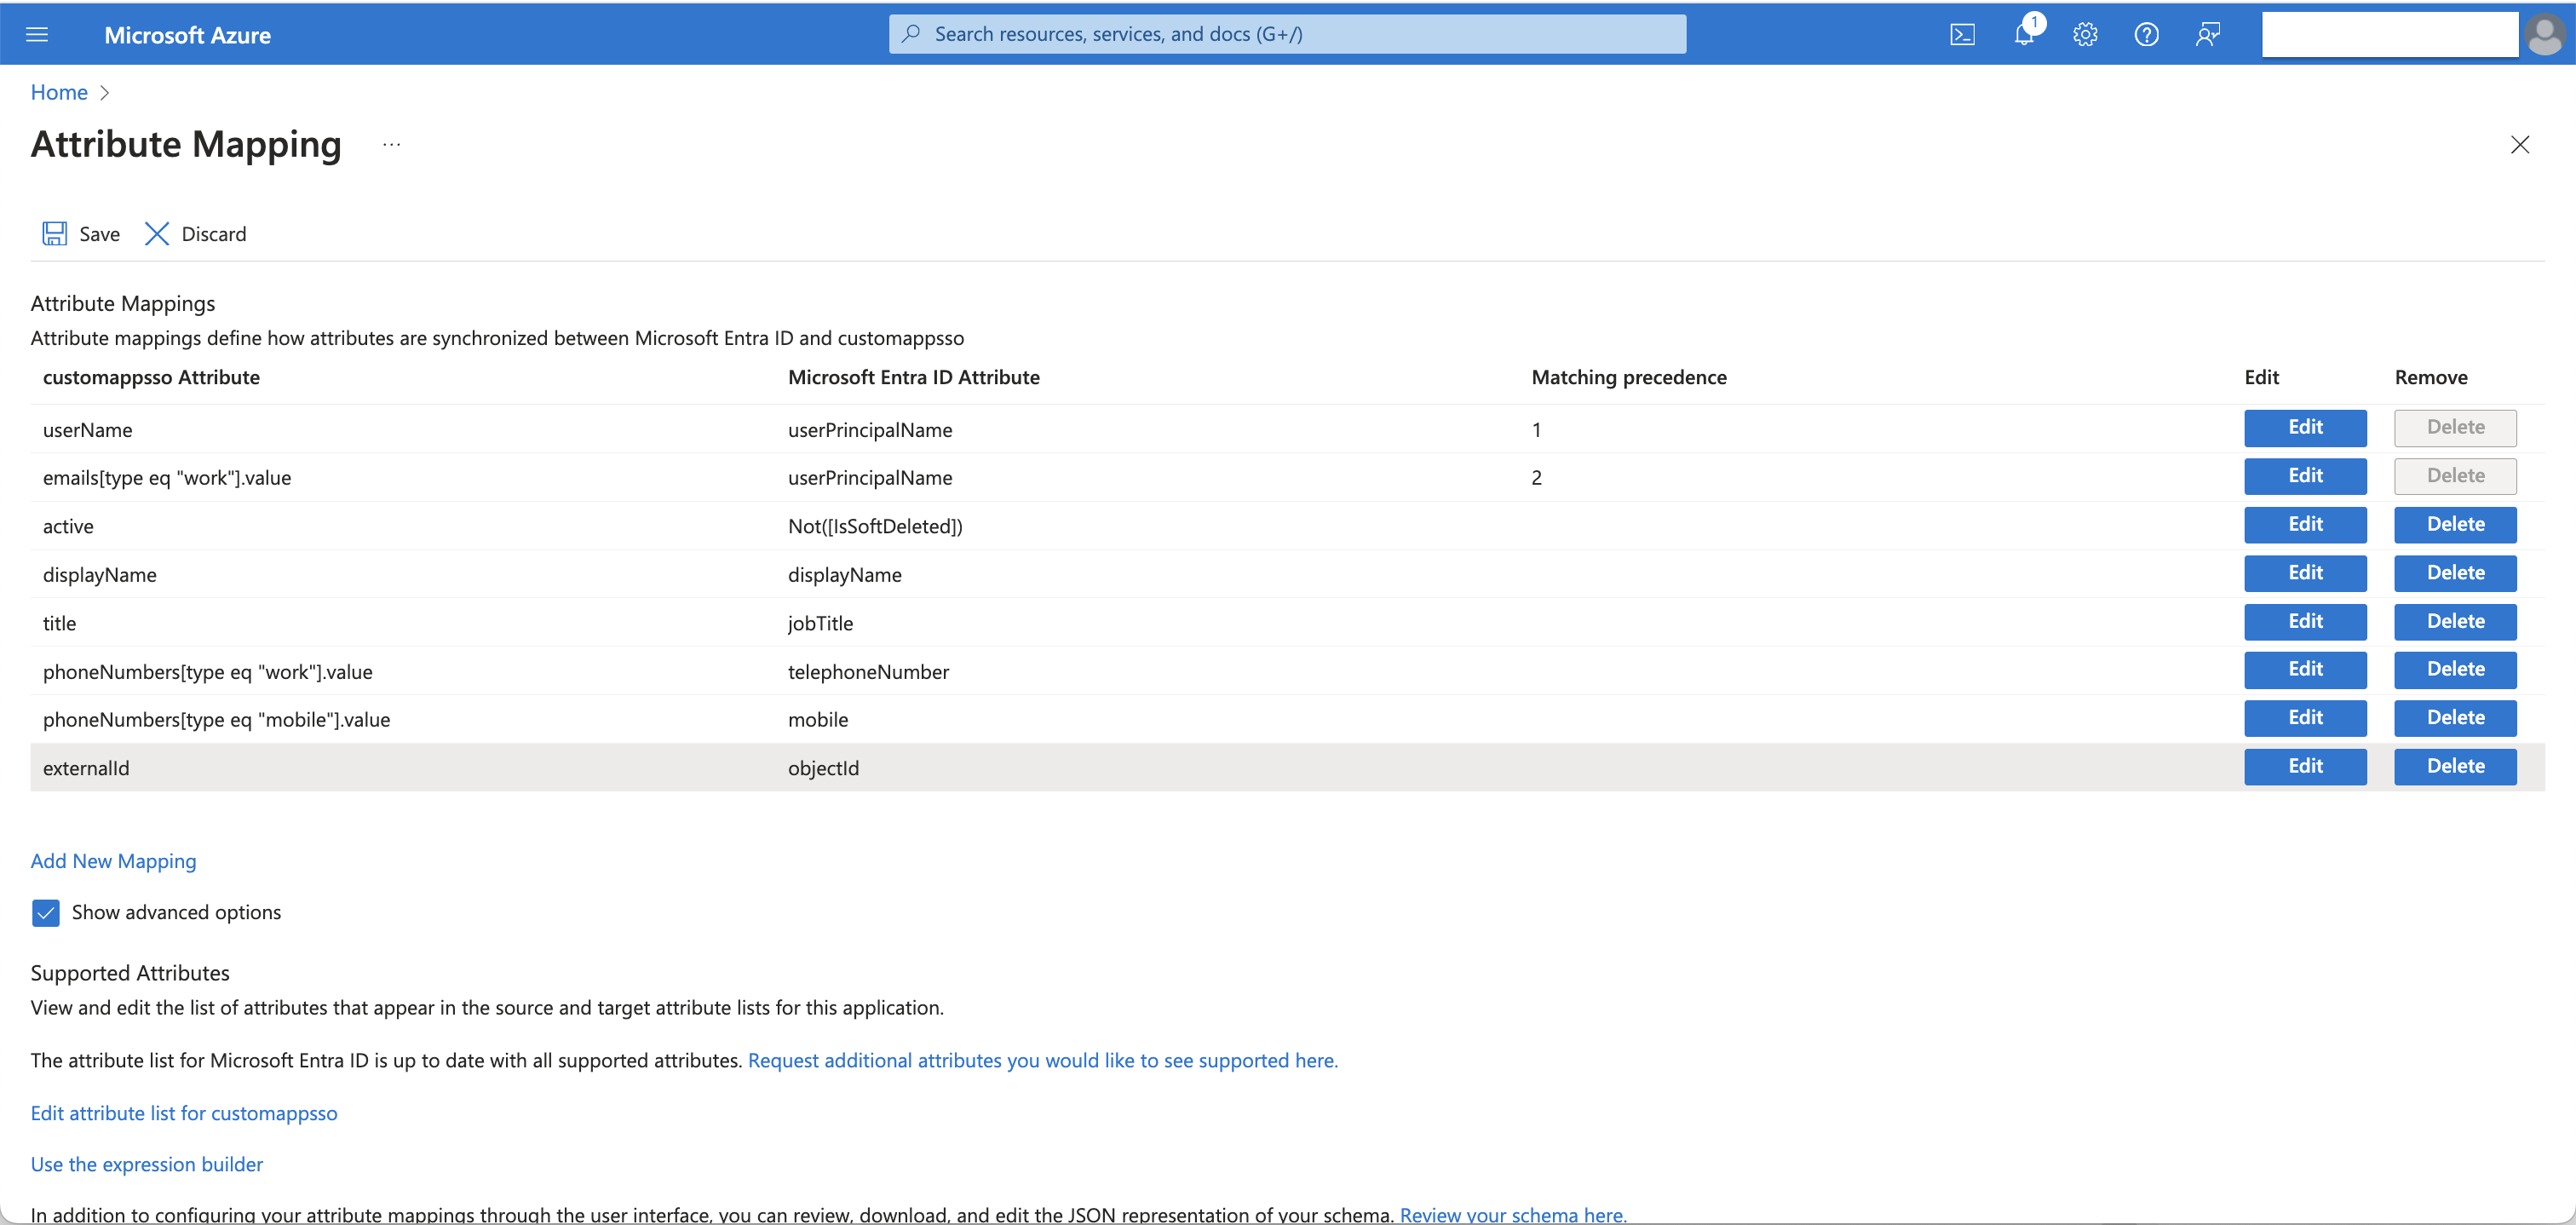
Adjust your user attribute mappings to include only the attributes of your Azure AD users that you want in Facilio. Delete all unwanted attributes for successful provisioning. Arrange your default attributes as shown in the screenshot below. Click the Save button every time you perform an action within attribute mapping.
Important Points to Note When Editing AD User Attributes
For the target customappsso attribute emails[type eq "work"].value, change the source attribute from mail to userPrincipalName.
For the target customappsso attribute active, change the default expression value from Switch([IsSoftDeleted], , "False", "True", "True", "False") to Not([IsSoftDeleted]).
For the target customappsso attribute externalId, change the source attribute from mailNickname to objectId.
For the Azure AD attribute jobTitle, values will be auto-updated in the Designation field of the Facilio Employee module after a successful SCIM sync.
Adding Facilio's Custom Fields to Attributes
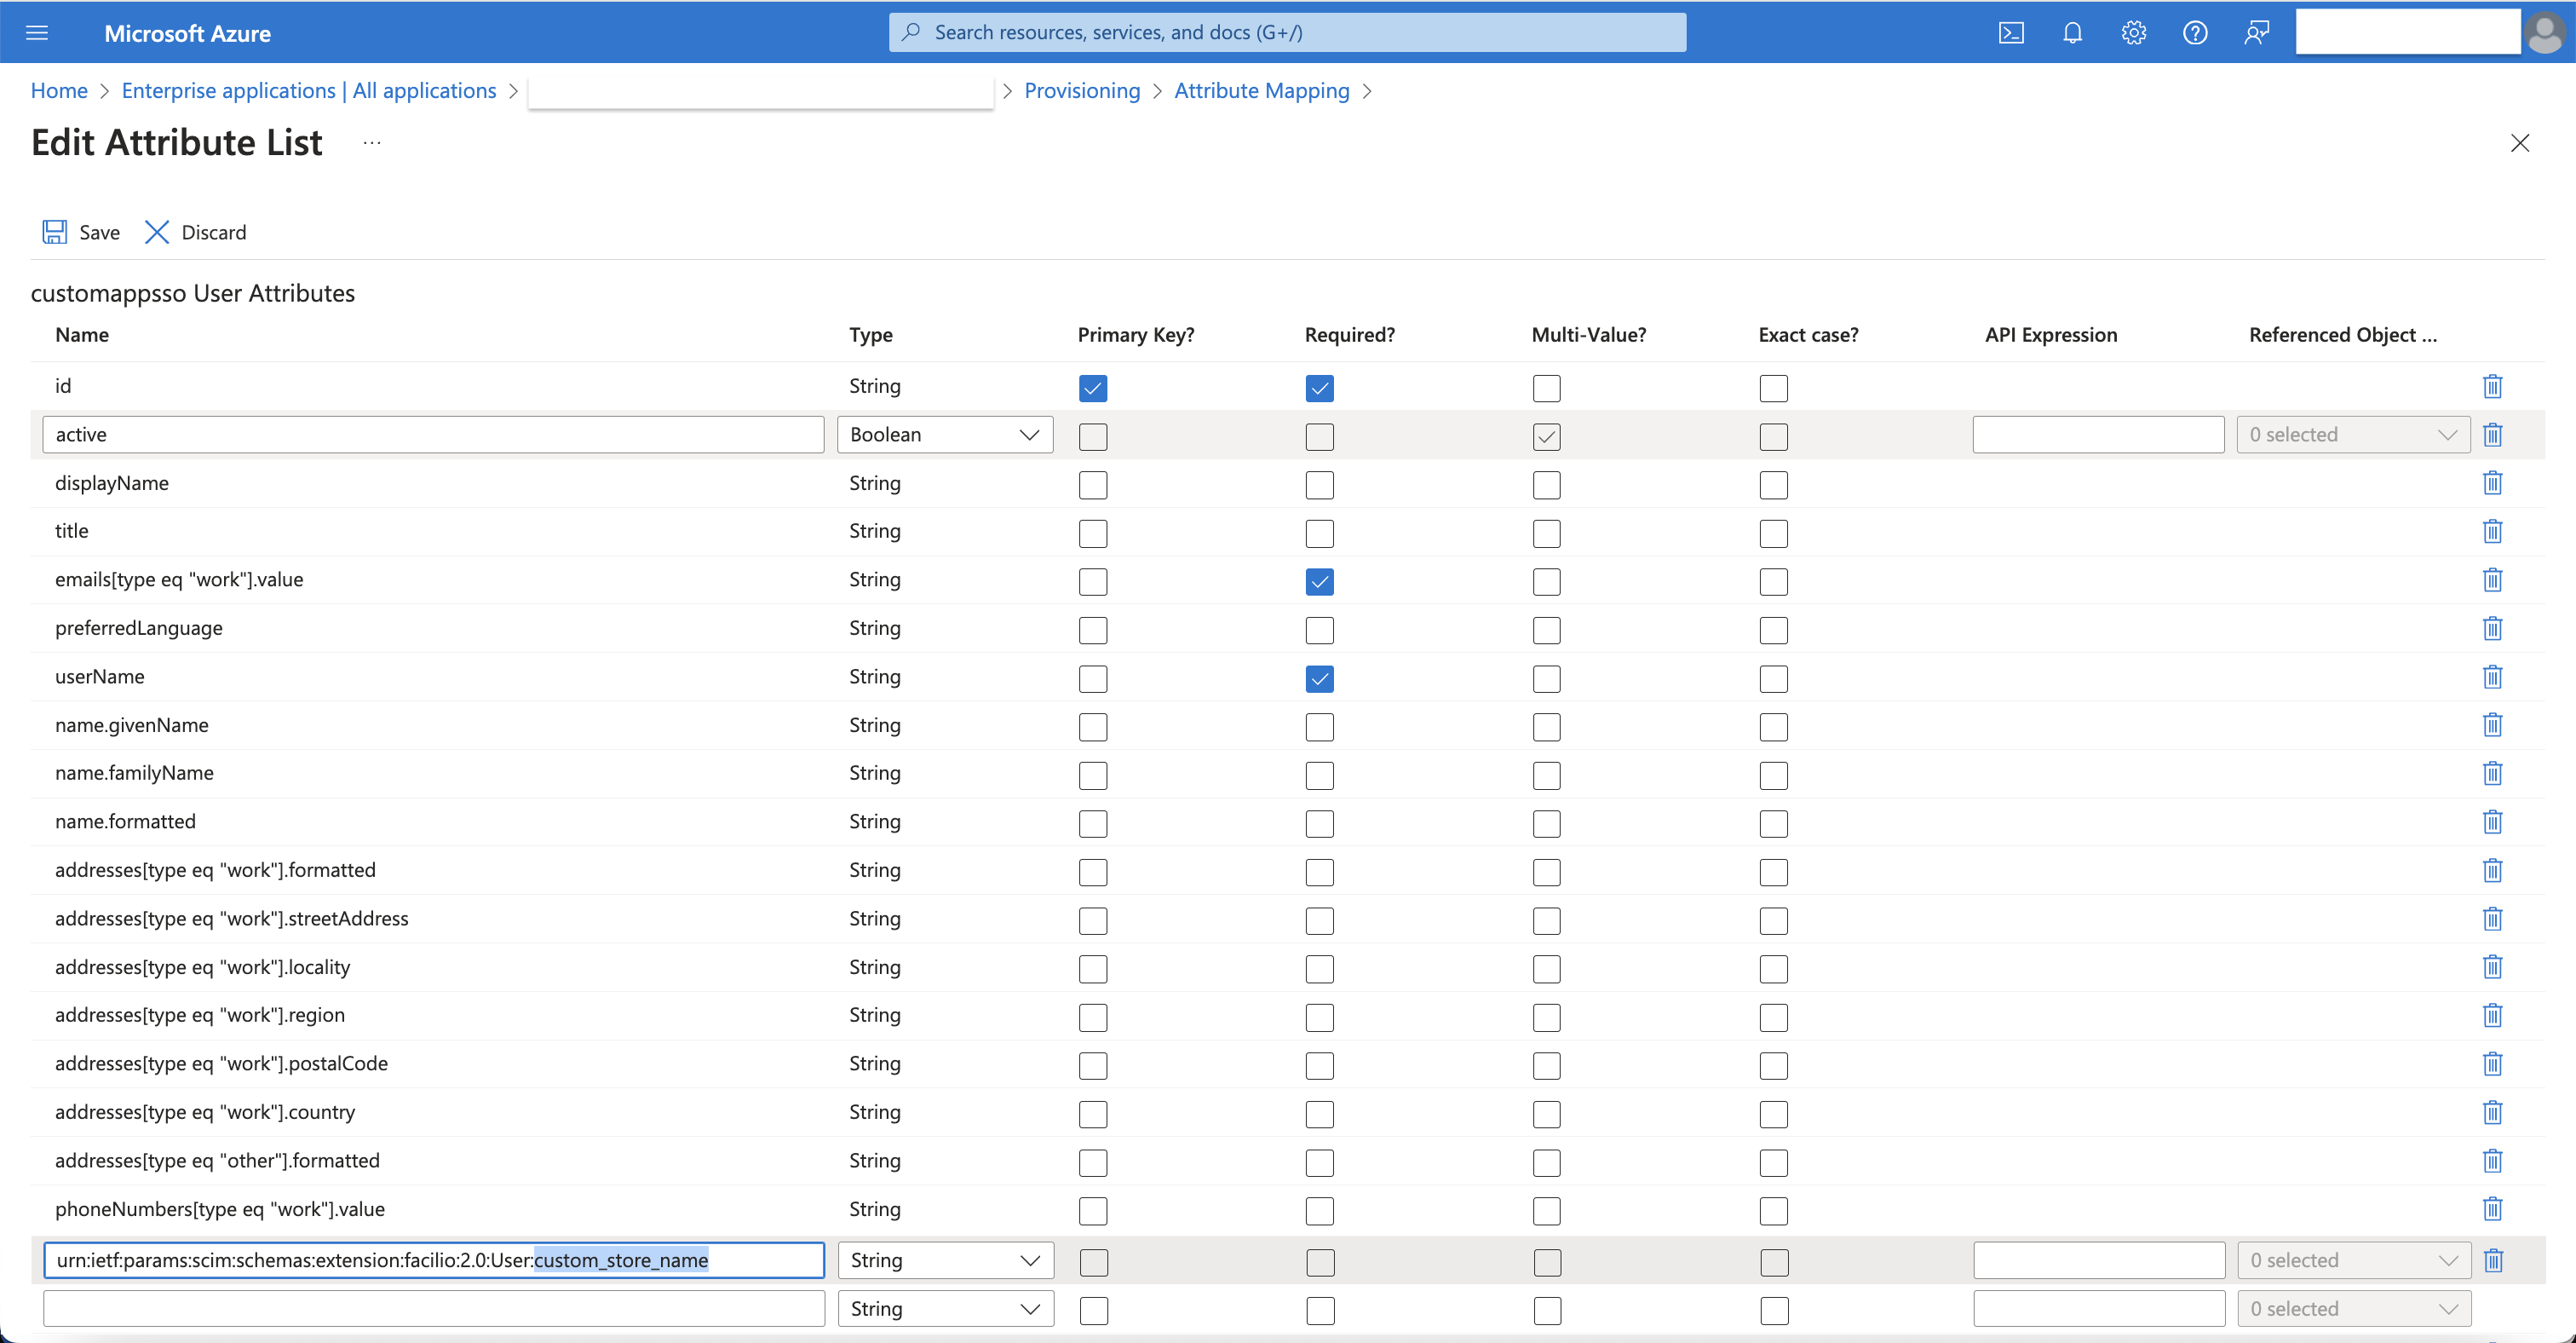
To add custom attributes from Facilio, enable the Show advanced options checkbox, then click Edit attribute list for customappsso.
Before updating the customappsso schema, ensure you mark the AD source attribute userPrincipalName as required. This action will automate synchronization of Azure AD email addresses with Facilio during account provisioning.
To add a Facilio custom field as a customappsso User Attribute, copy the custom field name from Facilio and construct a URN pattern like this: urn:ietf:params:scim:schemas:extension:facilio:2.0:User:<facilio_custom_field_link_name>.
tip
To find the custom field link name for the Facilio Employee module, go to: Admin Settings > Customization > Modules > System > Employee > Fields. Then, look in the Link Name column for the desired custom field.
Change the attribute type relevant to the Facilio data type.
Note: Only String, Integer, and Boolean type attributes are supported.Click Save to create a custom attribute mapping.
Common Operations
Create User: Ensure the correct user attributes are configured in your Azure AD to create a user in Facilio.
Update User: Ensure the updated user attributes are synced from your Azure AD to Facilio.
Delete User: Ensure the user is marked as
active=falsein Facilio when the user is deleted from your Azure AD application group.
Troubleshooting
Common Issues and Solutions
Connection Failures:
Issue: Unable to connect to the SCIM endpoint.
Solution: Verify the network configuration and ensure the endpoint is reachable.
Authentication Errors:
Issue: Unauthorized errors.
Solution: Ensure the secret token is correctly configured in the IdP.
Attribute Mapping Issues:
Issue: Custom attributes not being sent.
Solution: Verify attribute mappings in the IdP and ensure they conform to the SCIM schema.