Modifying User Details
You can update the user details in case of any modification to their personal information or permissions enabled. To make changes to an existing user,
Navigate to the Users module and select the user whose details are to be modified. The user details are displayed as shown below.
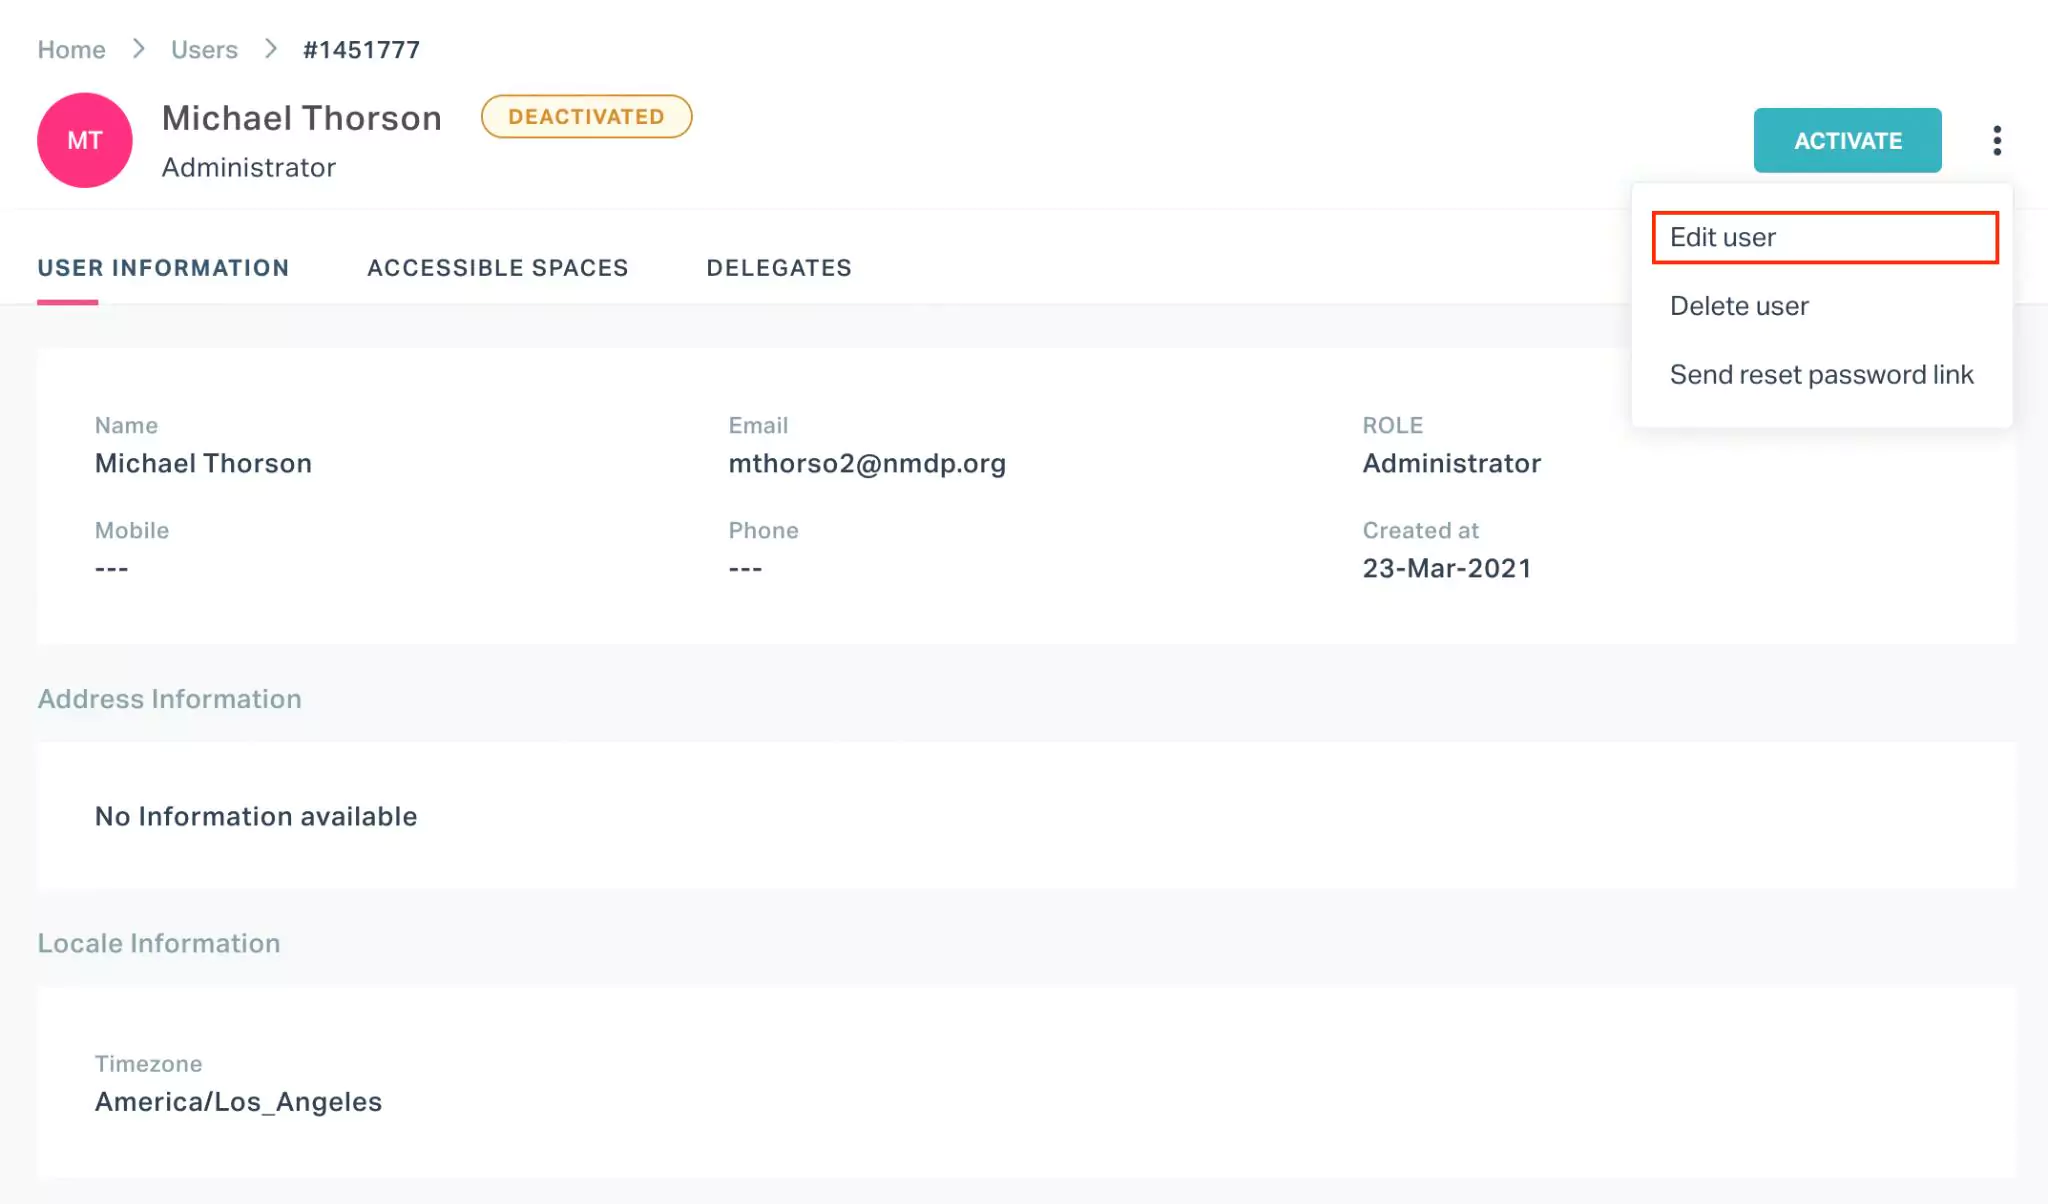
Click the icon and select Edit user. The EDIT USER DETAILS window appears as shown below.
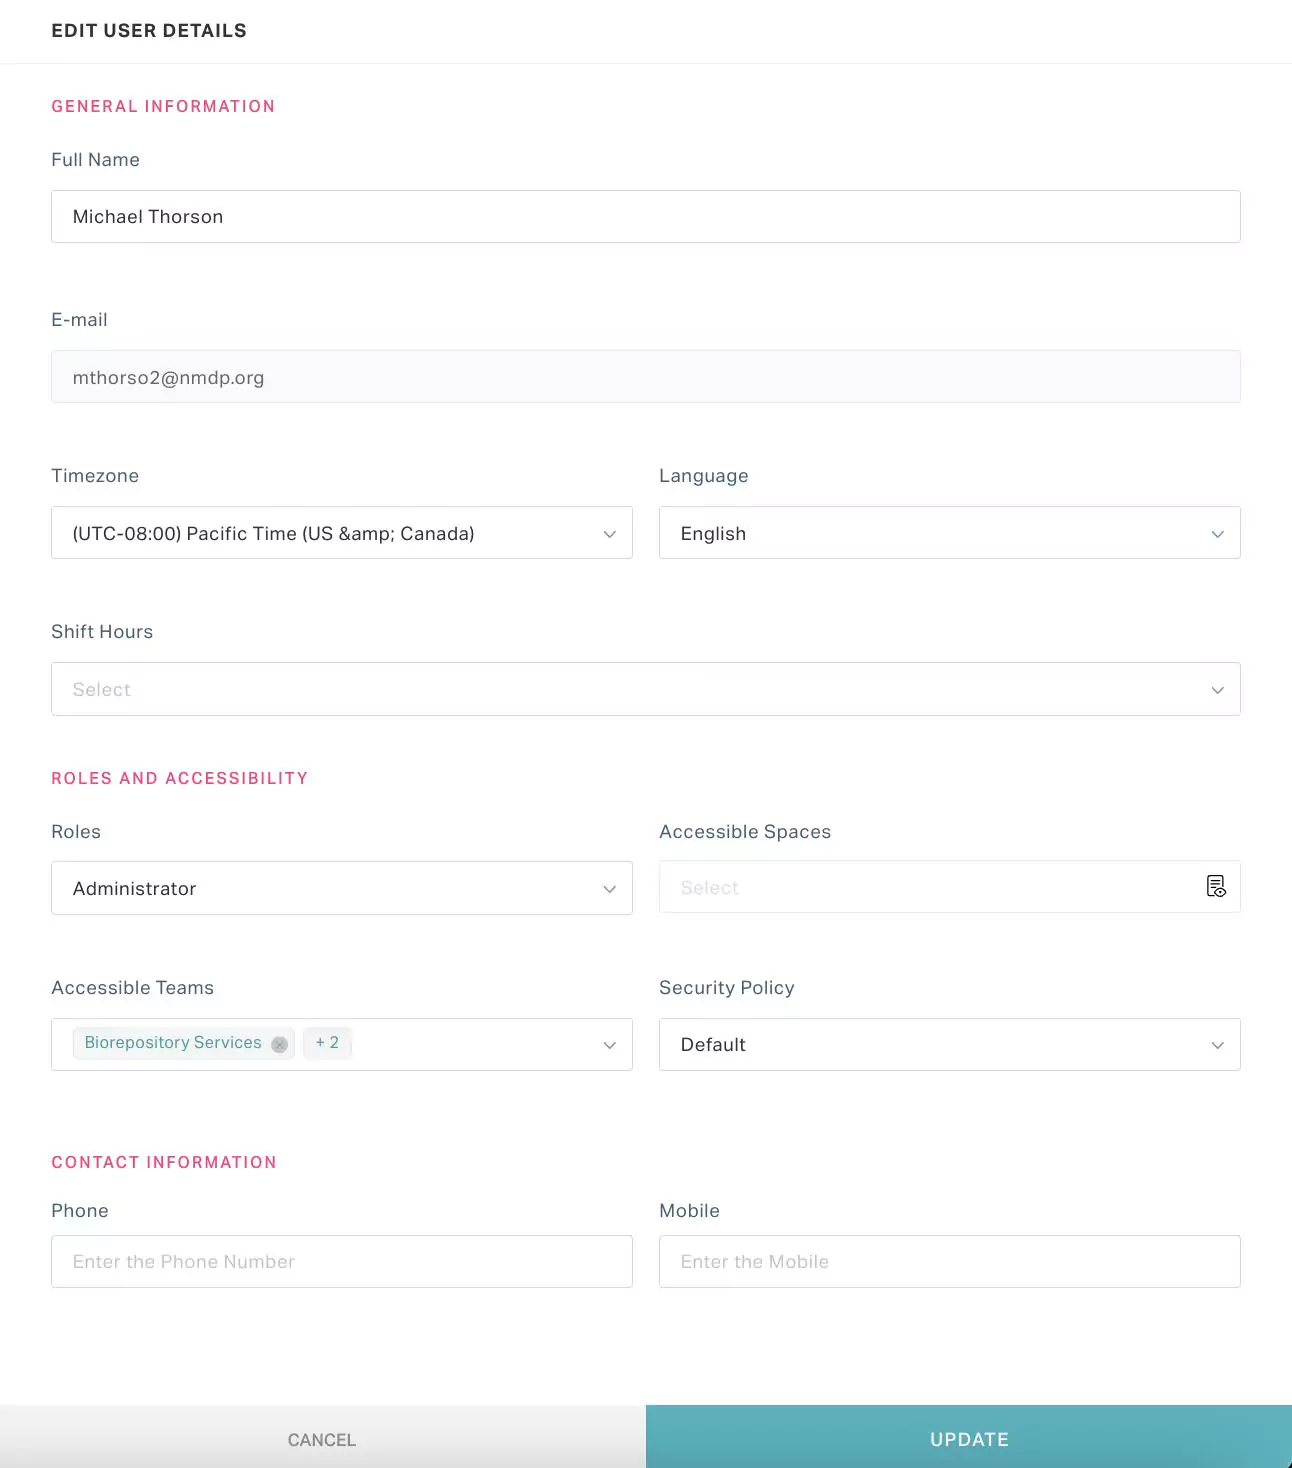
Modify the required details and click UPDATE. The changes are now saved to the user account.
In case of modification to the associated role or accessible space and asset details, it takes effect after the user subsequently logs into the system.
You can also use the icon respective to the user record in the USERS view to edit the user details.

As a part of user details modification, you can also perform the following actions:
Managing Accessible Spaces
It is important for an administrator to control the spaces accessible for the user, in order to restrict the users from accessing the unauthorized spaces and the respective resources (for example, assets, inventories and work orders associated with the restricted spaces). The application allows you to add or remove authorized spaces to a user account. To add accessible spaces for a user,
Navigate to the Users module and select the user to whom the new space is to be associated. The respective user details screen appears.
Go to the ACCESSIBLE SPACES section. The list of authorized spaces for the user are displayed as shown below.
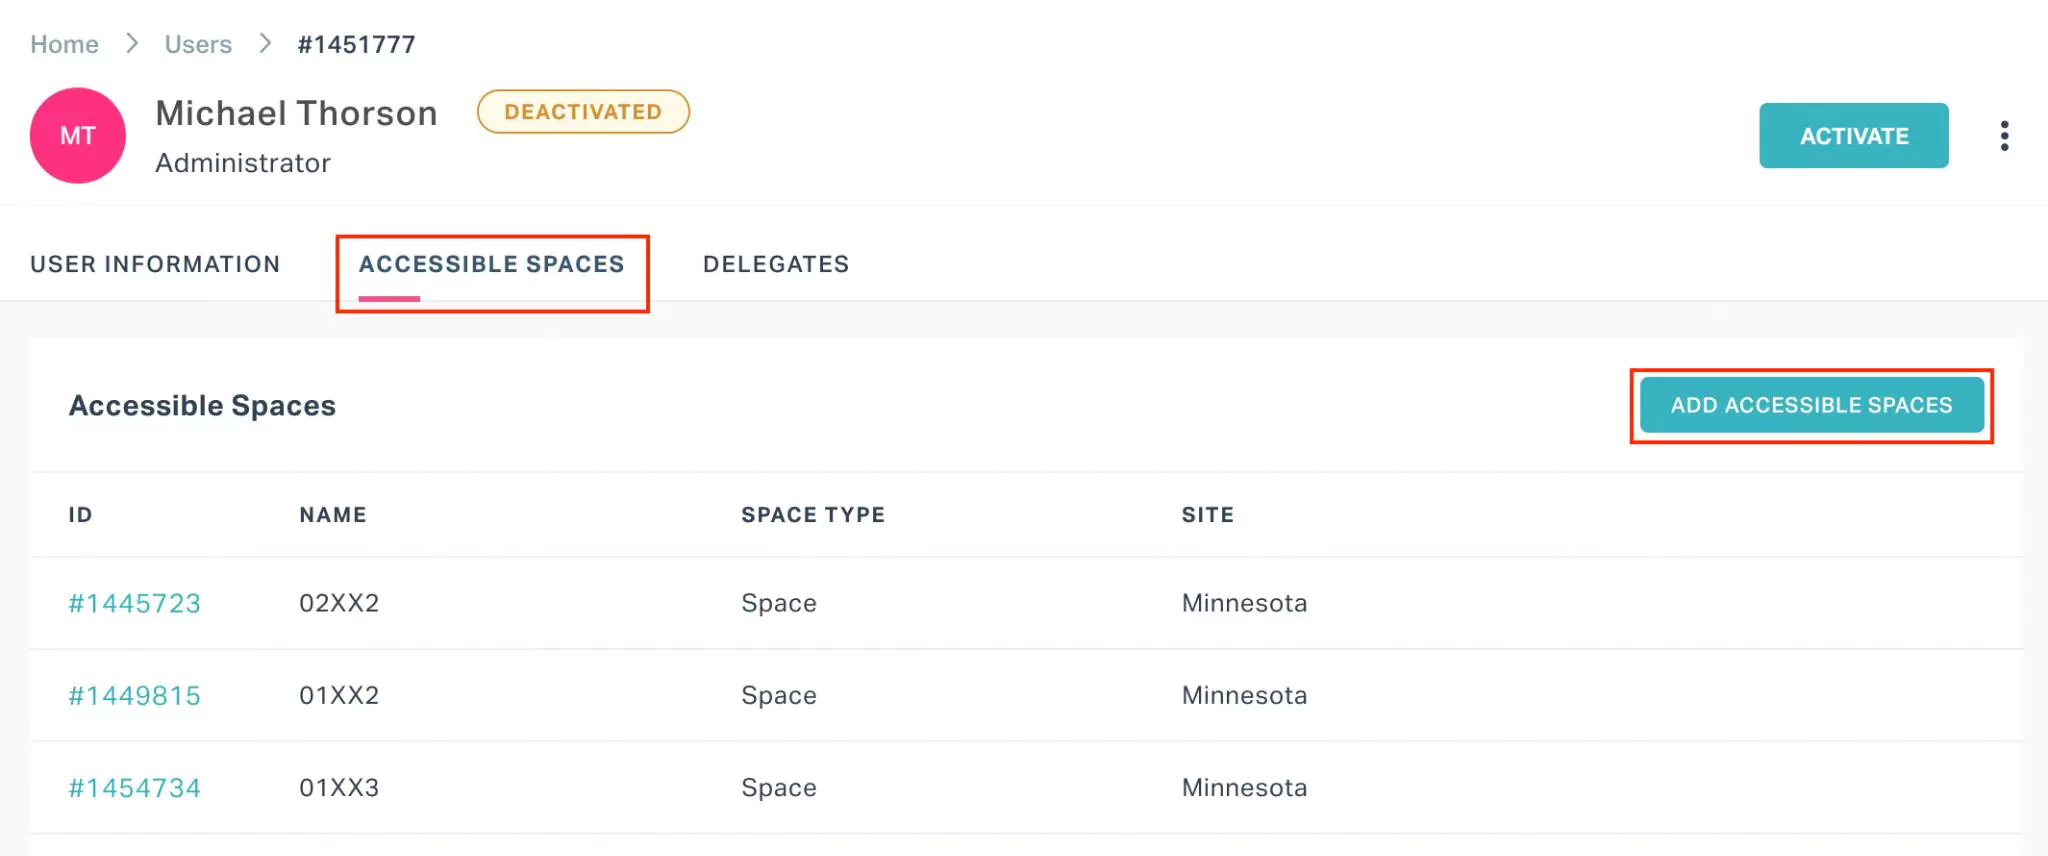
Click ADD ACCESSIBLE SPACES. The respective dialog box appears as shown below.
Select the SItes and Buildings that are accessible for the user.
Note: These are multi-select fields.Click CONFIRM. The user is now authorized to access the selected spaces and the respective items and resources.
You can use the icon respective to a space to remove it from the authorized list of spaces for the user.
You can also modify the list of associated spaces from the The EDIT USER DETAILS window. Read the Modifying User Details section for more information.
Managing Delegates
To ensure uninterrupted services, you can always choose an alternate user to take up the roles and responsibilities of a critical user in an organization during his/her absence. Sometimes it might not be required to delegate the whole responsibility of a particular user to another. The application allows you to select a delegate and configure the necessary permissions to be transferred for a particular period of time. To add a delegate for a user,
Navigate to the Users module and select the user whose responsibilities are to be delegated. The respective user details screen appears.
Go to the DELEGATES section. The list of delegates configured for the user are displayed as shown below.
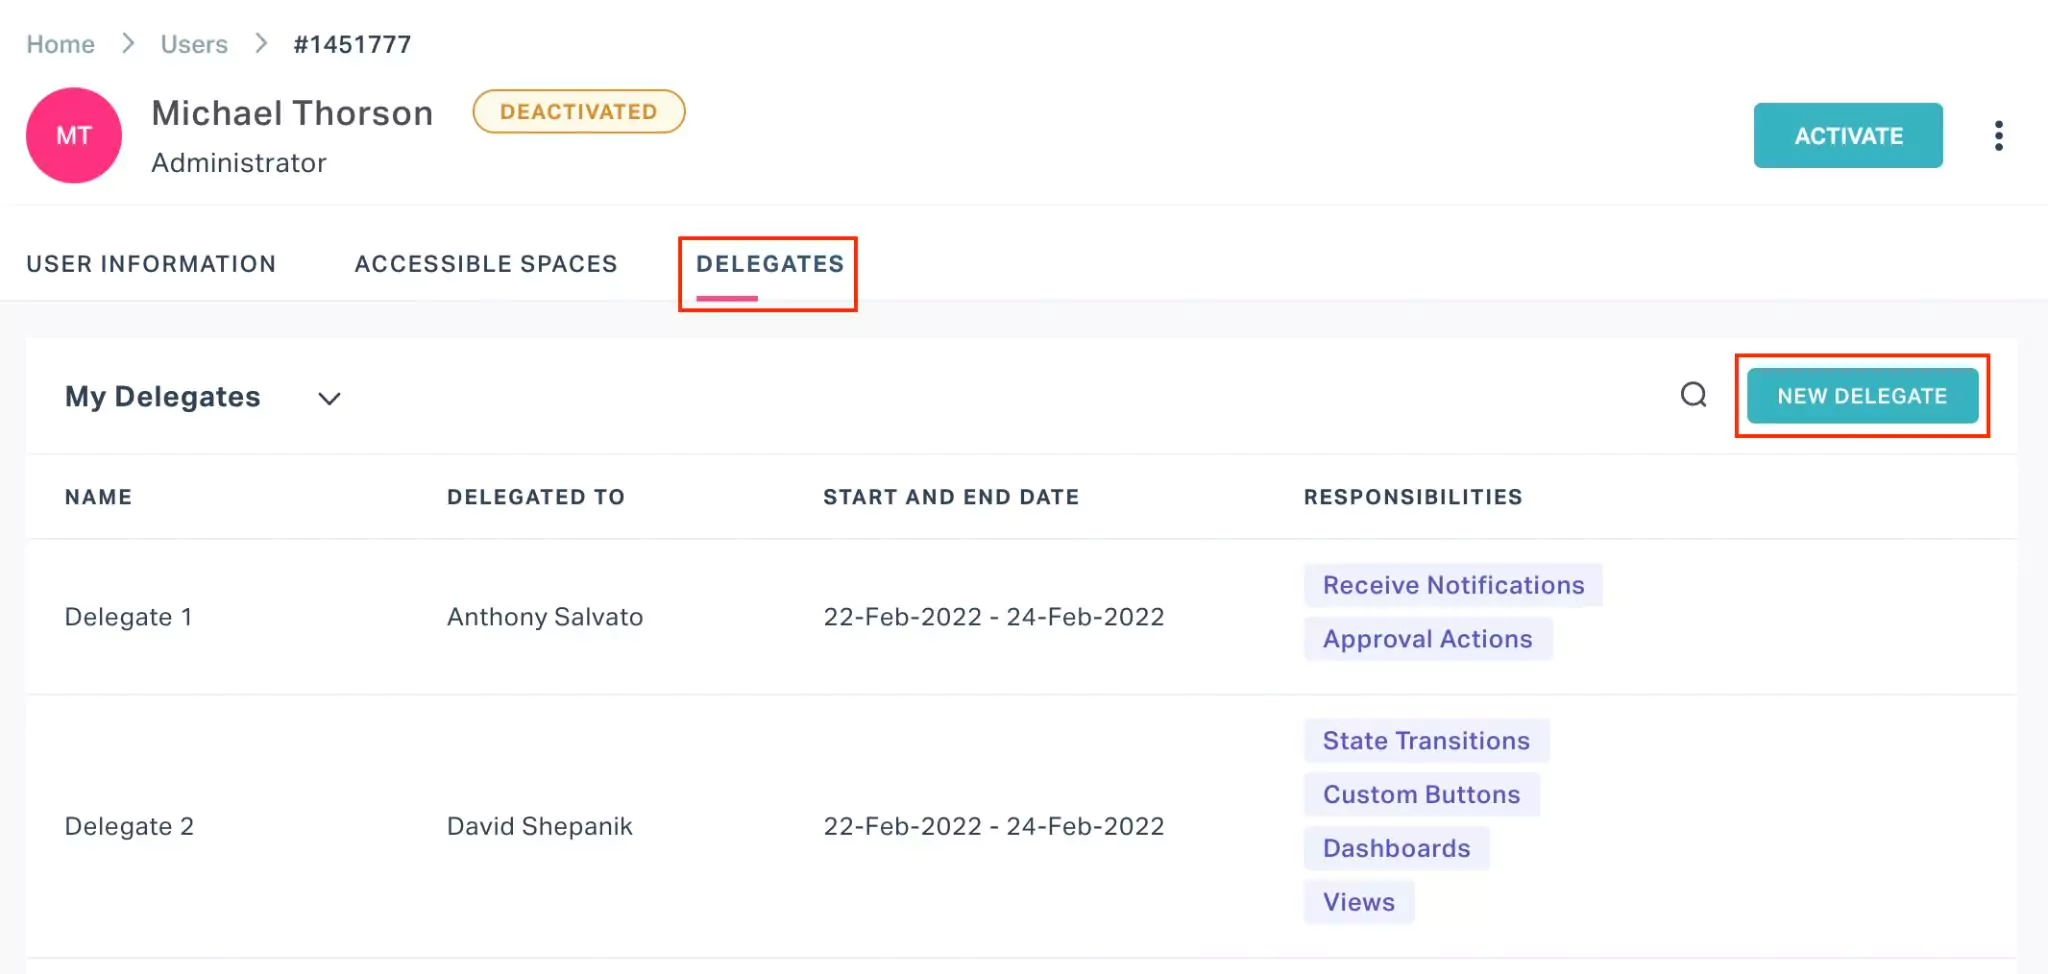
Click NEW DELEGATE. The ADD DELEGATE window appears as shown below.
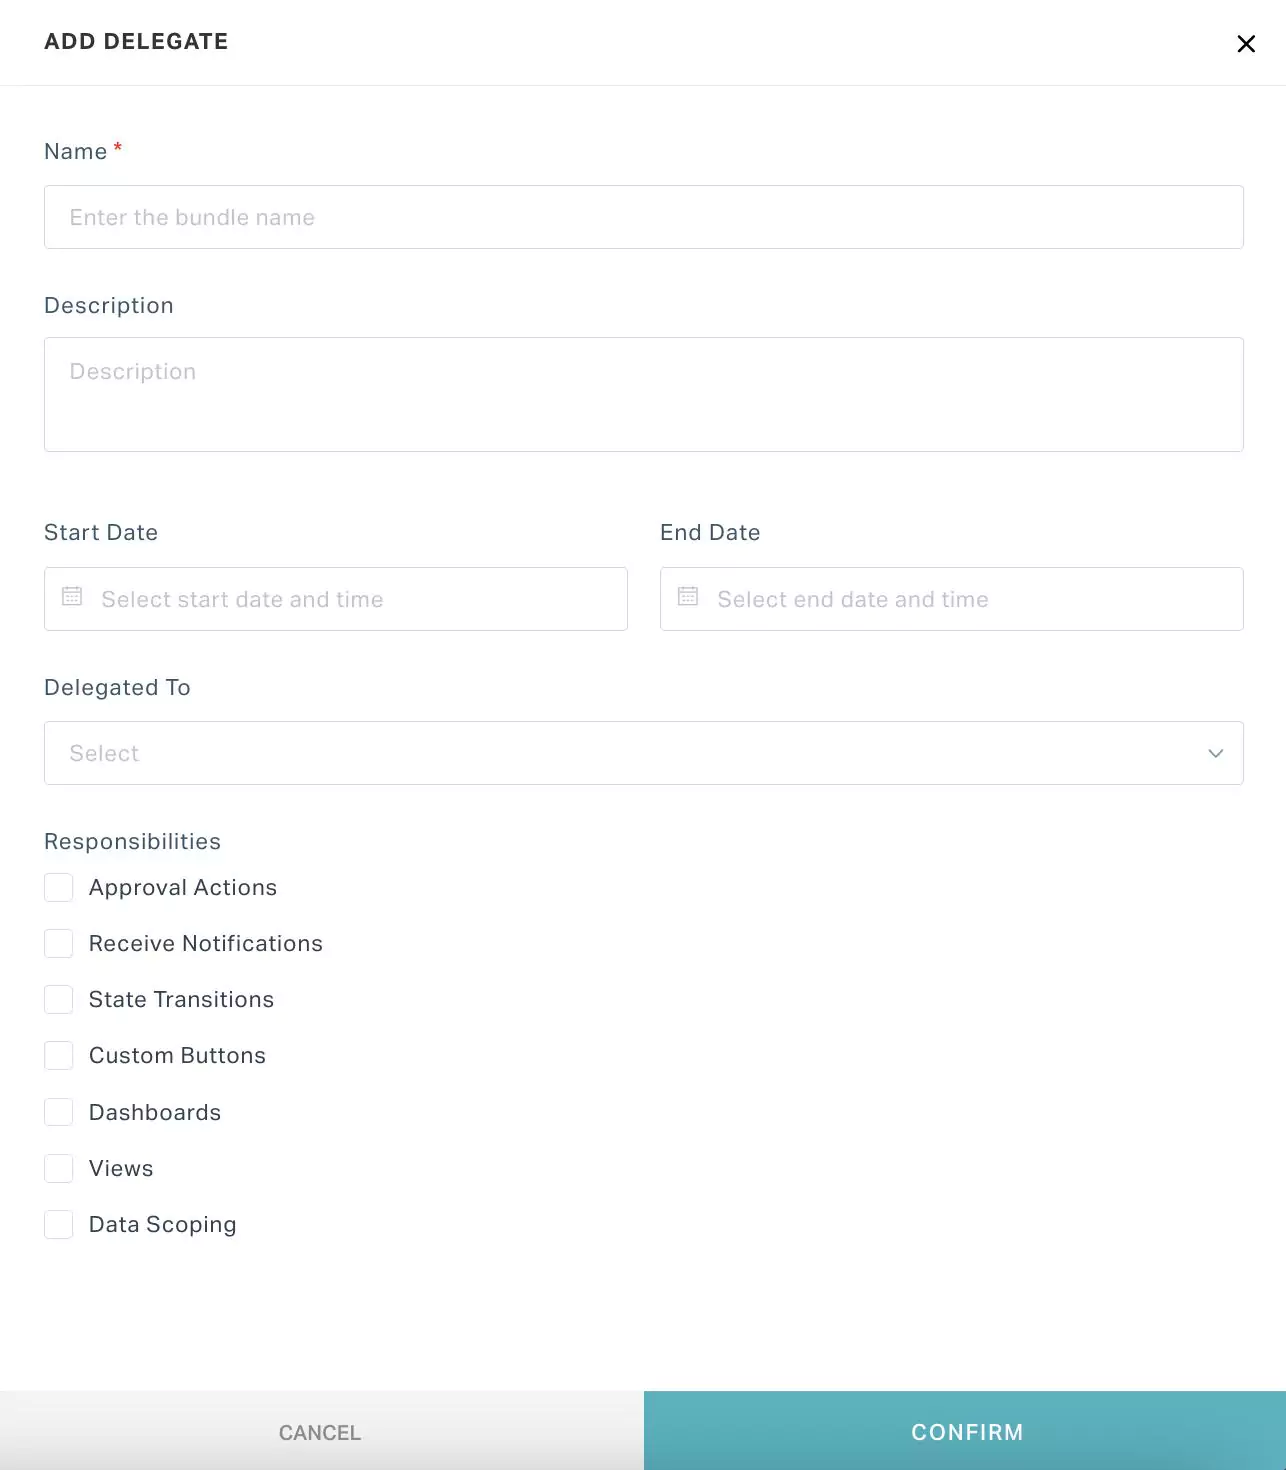
Update the following fields in this screen:
- Name - A name for the delegation
- Description - A short description on the delegation being configured explaining the reason or the purpose.
- Start Date - The date from which the delegate is empowered for the selected responsibilities
- End Date - The date till which the delegate is empowered for the selected responsibilities
- Delegated to - The user to whom the actions are delegated
- Responsibilities - The information and actions that are delegated to the other user (delegatee). The responsibilities that can be enabled for delegation are listed below:
- Approval Actions - The act of giving assent on behalf of the selected user to complete a task
- Receive Notifications - The authority to receive notifications configured in response to a transition that are allowed for the selected user
- State Transitions - The rights to view selected transitions that are enabled for the selected user
- Custom Buttons - The permission to use the custom buttons that are accessible for the selected user
- Dashboards - The permission to view or modify the dashboards that the enabled for the selected user
- Views - The access to the views that are shared to the selected user
- Data Scoping - The act of sharing all the data that are accessible for the selected user.Example: Let us say, Paul is the Facility Admin for Site A and Sarah is the Facility Admin for Site B, who does not have access to Site A data. If Paul delegates the responsibilities to Sarah, Sarah will be able to access Site A data as well.
Click CONFIRM. The configured responsibilities are now delegated to the selected user for the planned duration.
You can use the or icon to modify the delegation details or remove the delegate, respectively.