Managing Custom Buttons
This section explains how to create buttons on your own, assign respective behavior or action, and position them in the application as required.
Adding Custom Button
Apart from the stateflow buttons, additional buttons can be added to any module of the application, if there is a requirement to perform certain action over other modules or capture additional information. To create a new custom button,
Select the required module and navigate to the CUSTOM BUTTONS section. All the existing buttons are displayed, as shown below.
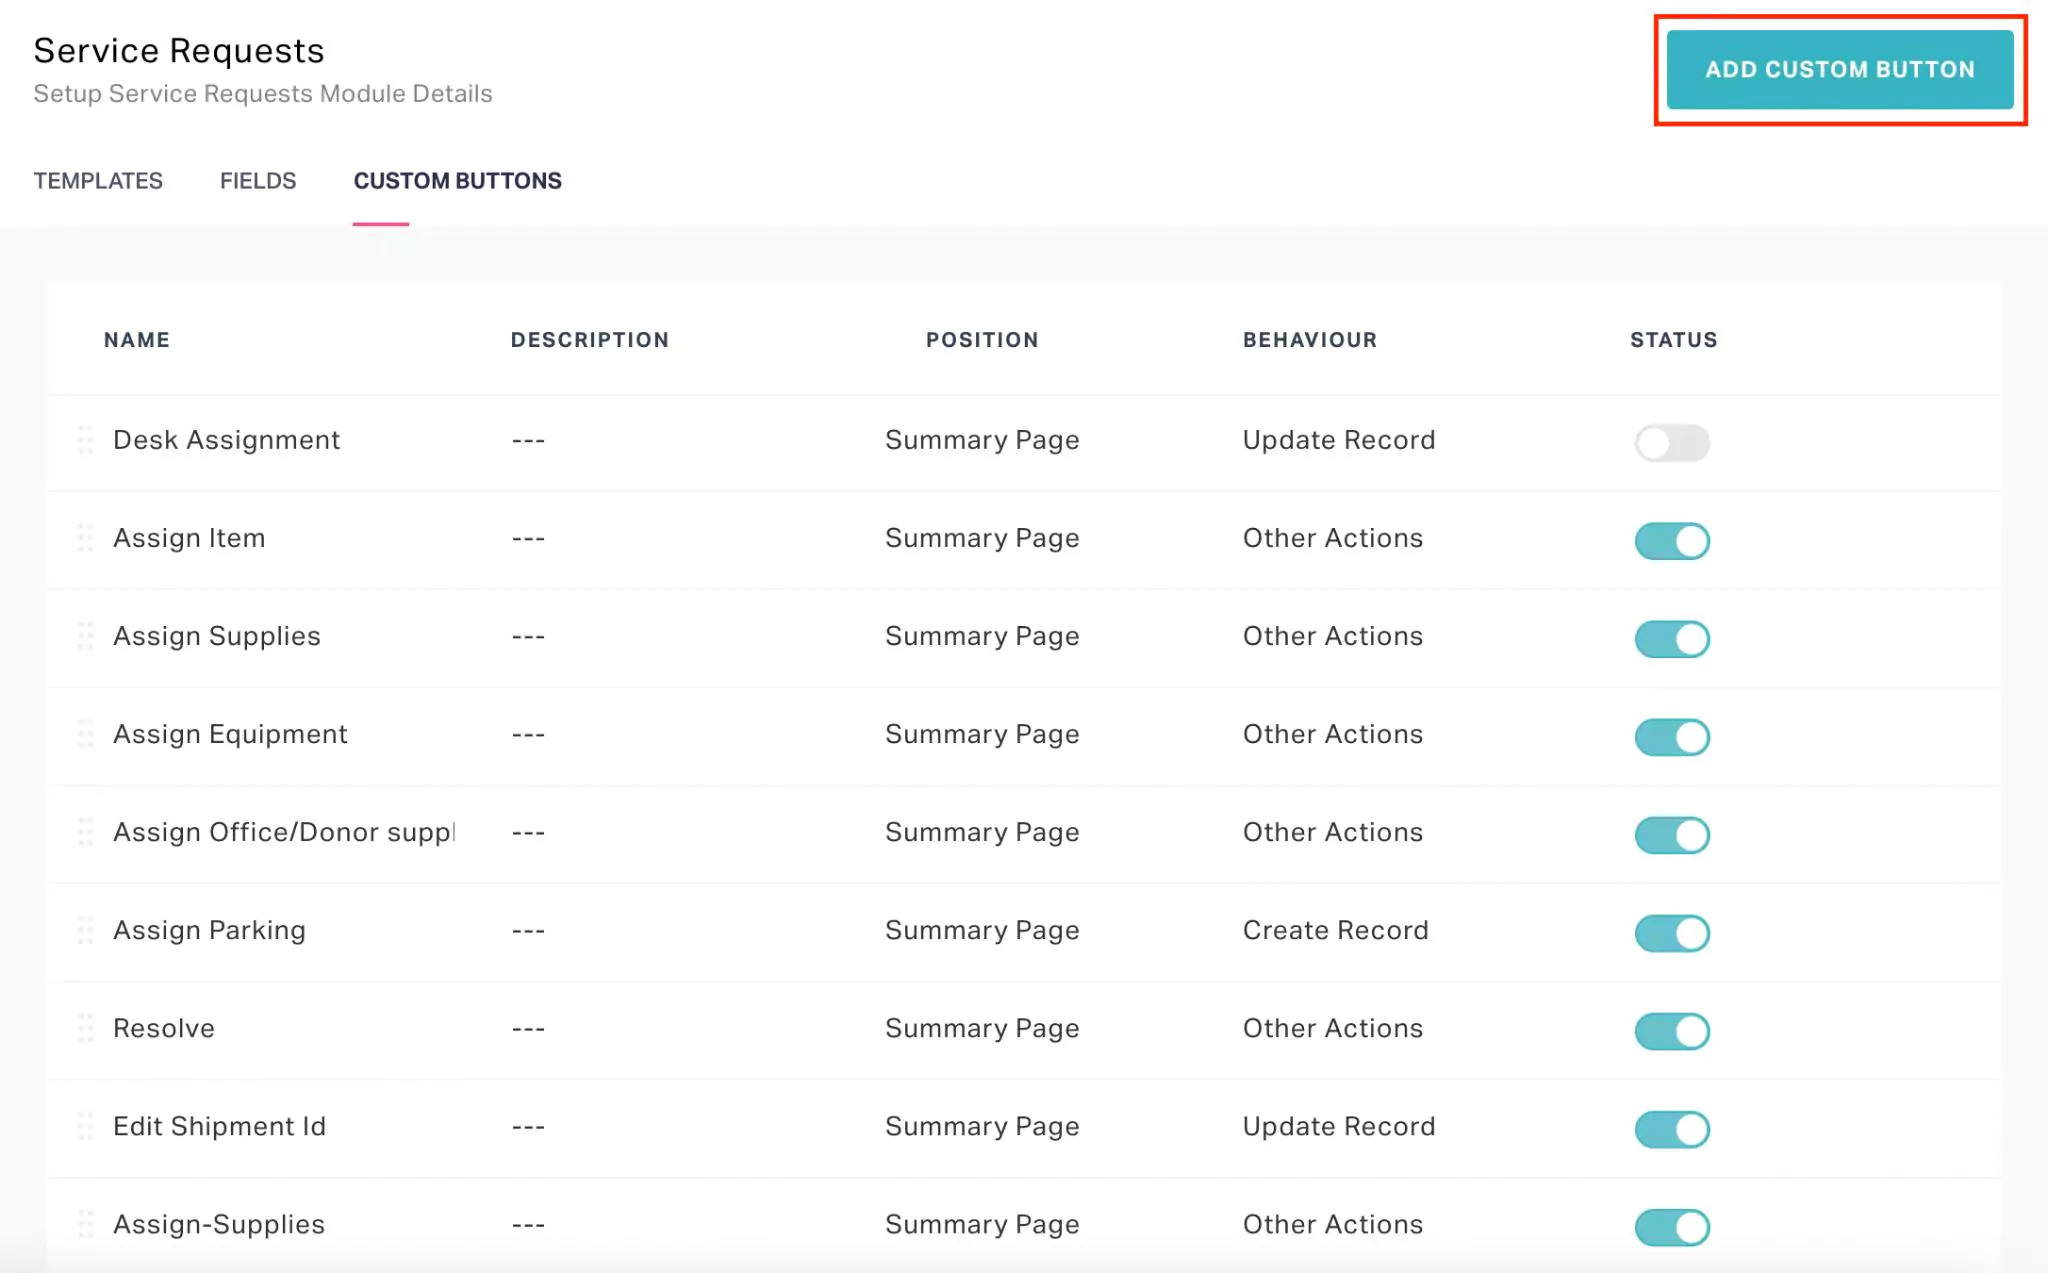
Click ADD CUSTOM BUTTON at the top right. The NEW CUSTOM BUTTON window appears as shown below.
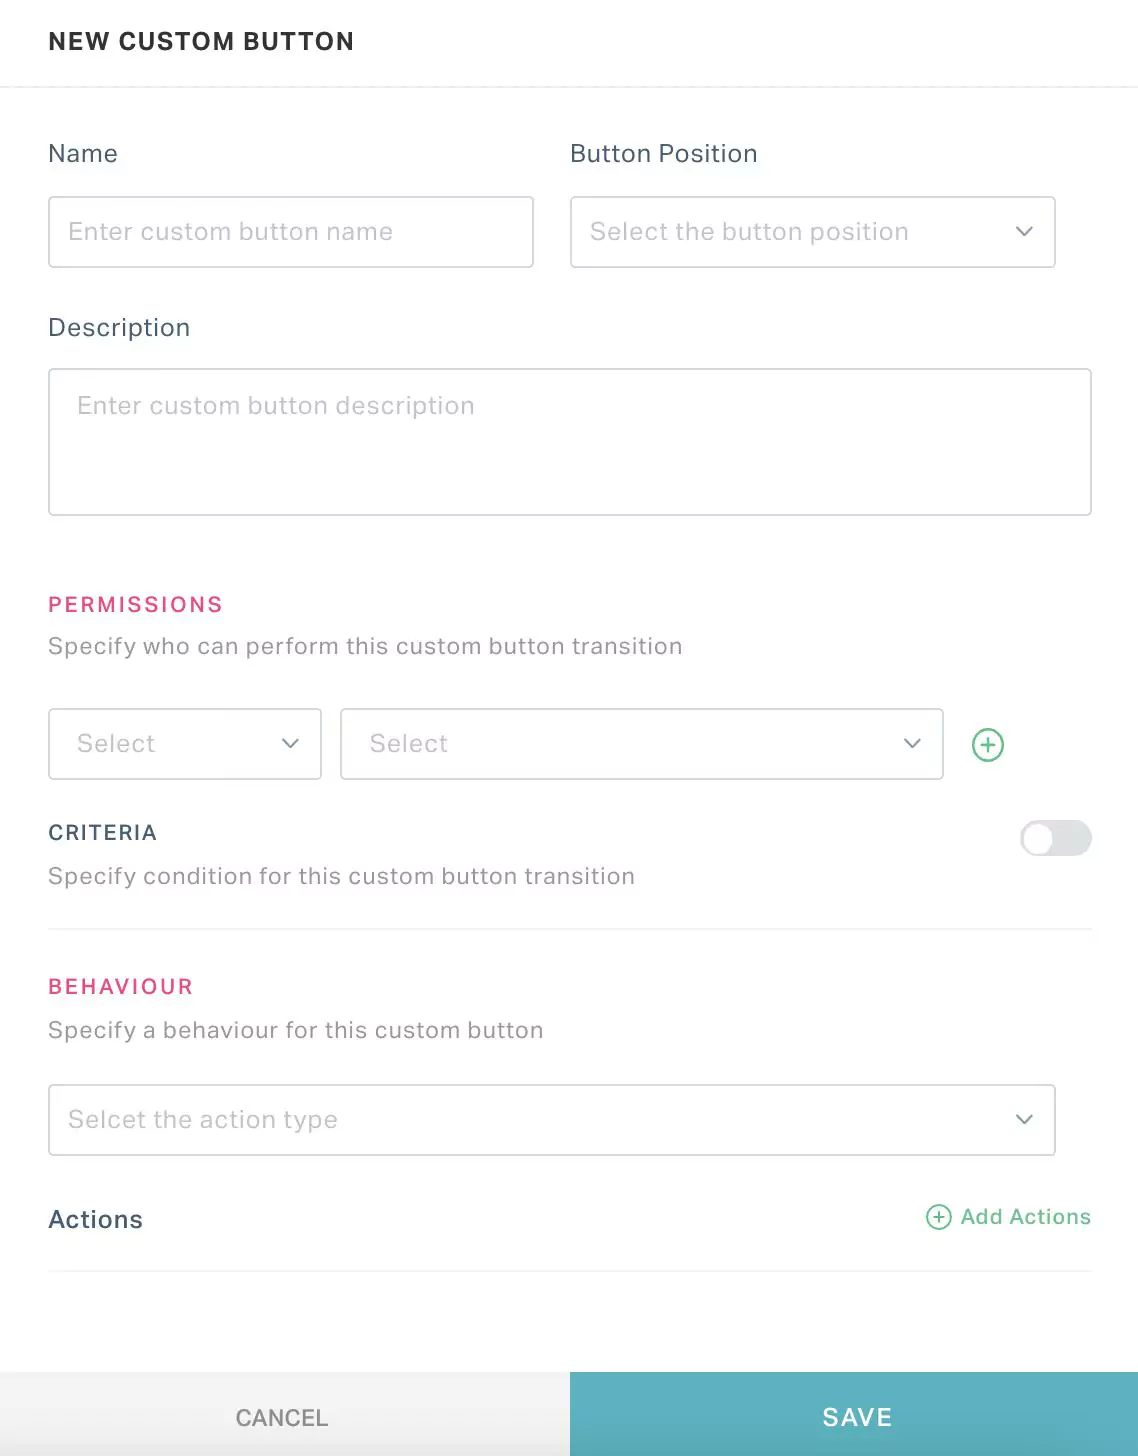
Update the following fields in this screen:
- Name - Enter the display name of the button
- Description - Provide short description about the button to be displayed for the user
- Button Position - Specify the details on where to place the button in the application. Read the Define Button Position section for more information.
- PERMISSIONS - Specify who can perform this custom button transition. Read the Define Permissions section for more information.
- CRITERIA - Specify condition(s) for this custom button transition. Read the Define Criteria section for more information.
- BEHAVIOR - Specify a behavior for this custom button. Read the Configure Behavior section for more information.
- Actions - Configure the action to be executed on click of the custom button. Read the Configure Action section for more information.
In addition, you may also have to configure other fields that appear with respect to the values set in the above fields. Read the Configuring Button Properties section for more information.
Click SAVE. The new custom button is now successfully added.
Configuring Button Properties
This section explains how to configure every detail associated with a button like the position of the button in the application, people for whom the button is accessible, the condition under which the button appears and so on.
Define Button Position
You can specify the screen and the position where the button should appear in the application. You can choose from the following options:
Summary Page - The button appears in the summary page of the record in the list view.

List Page - Each Record - The button appears against each record in the list view.

List Page - Bulk Actions - The button appears in the list view header that facilitates bulk actions (for example, delete multiple records, update a field value in multiple records).

List Page - Top Bar - The button appears in the main menu bar of the selected module, similar to sort and export icons.

Define Permissions
You can specify for whom the custom button is accessible in the application.
You can use the and buttons to add or delete a record in this section.
Define Criteria
You can specify the condition(s) under which the button is accessible.
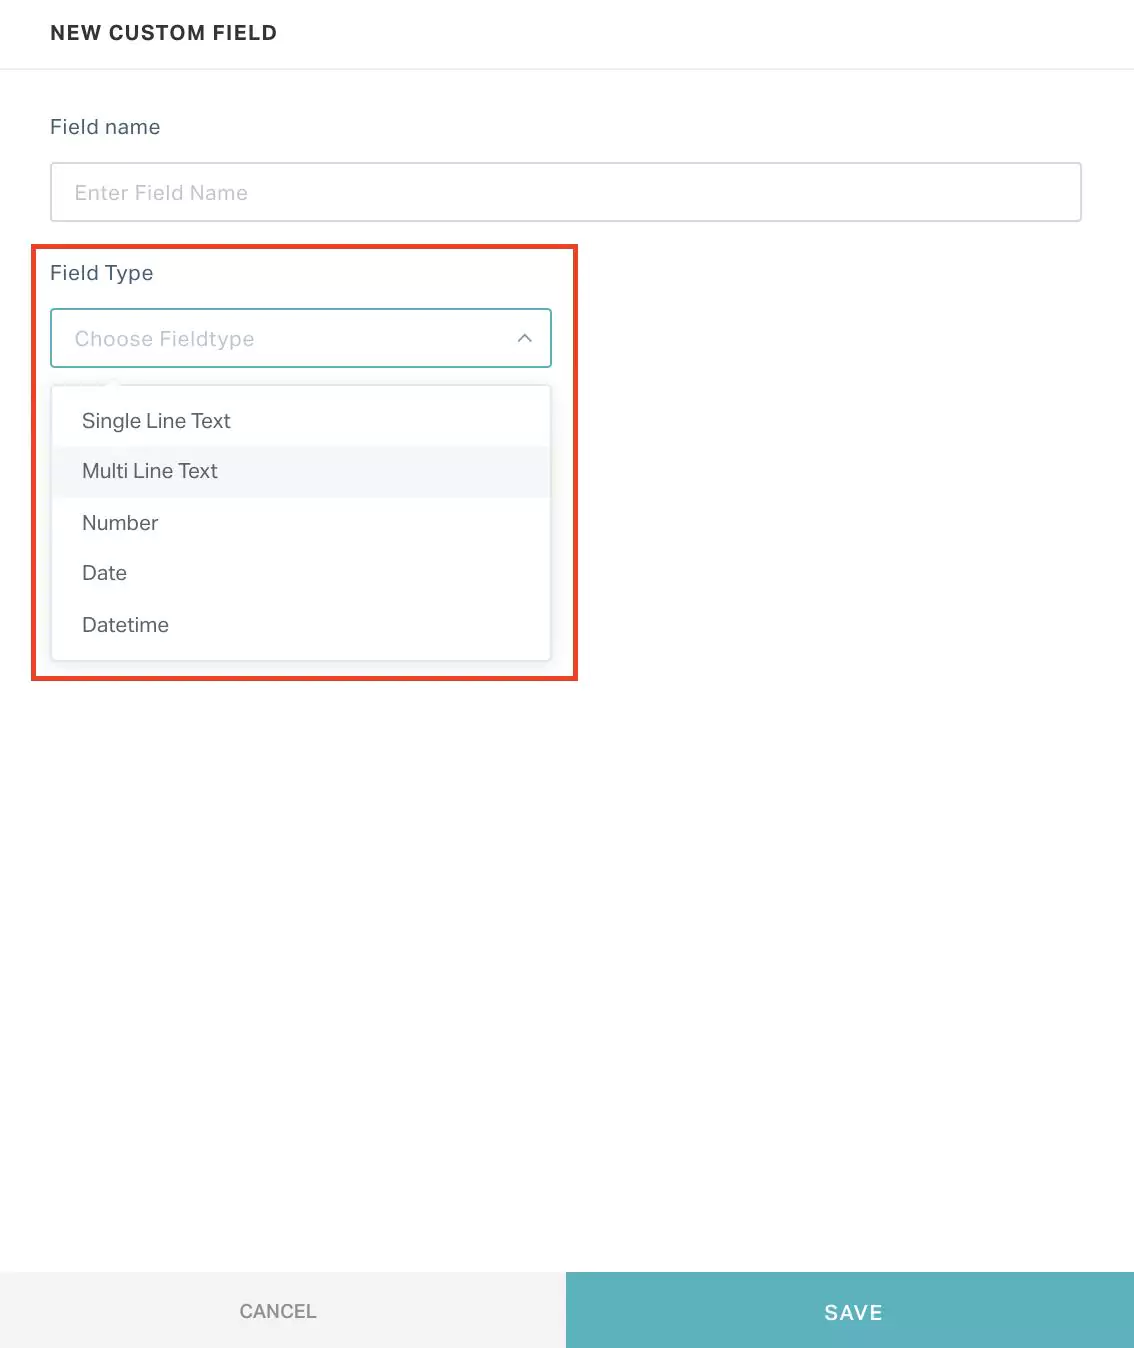
Use the toggle button to enable or disable criteria definition. Read the Configuring Criteria section for details on how to create a new criteria.
Configure Behavior
When you create a custom button, it is required that the respective behavior should also be specified. You can choose from any of the following options:
Create Record - To create a new record in the selected module using an existing template.
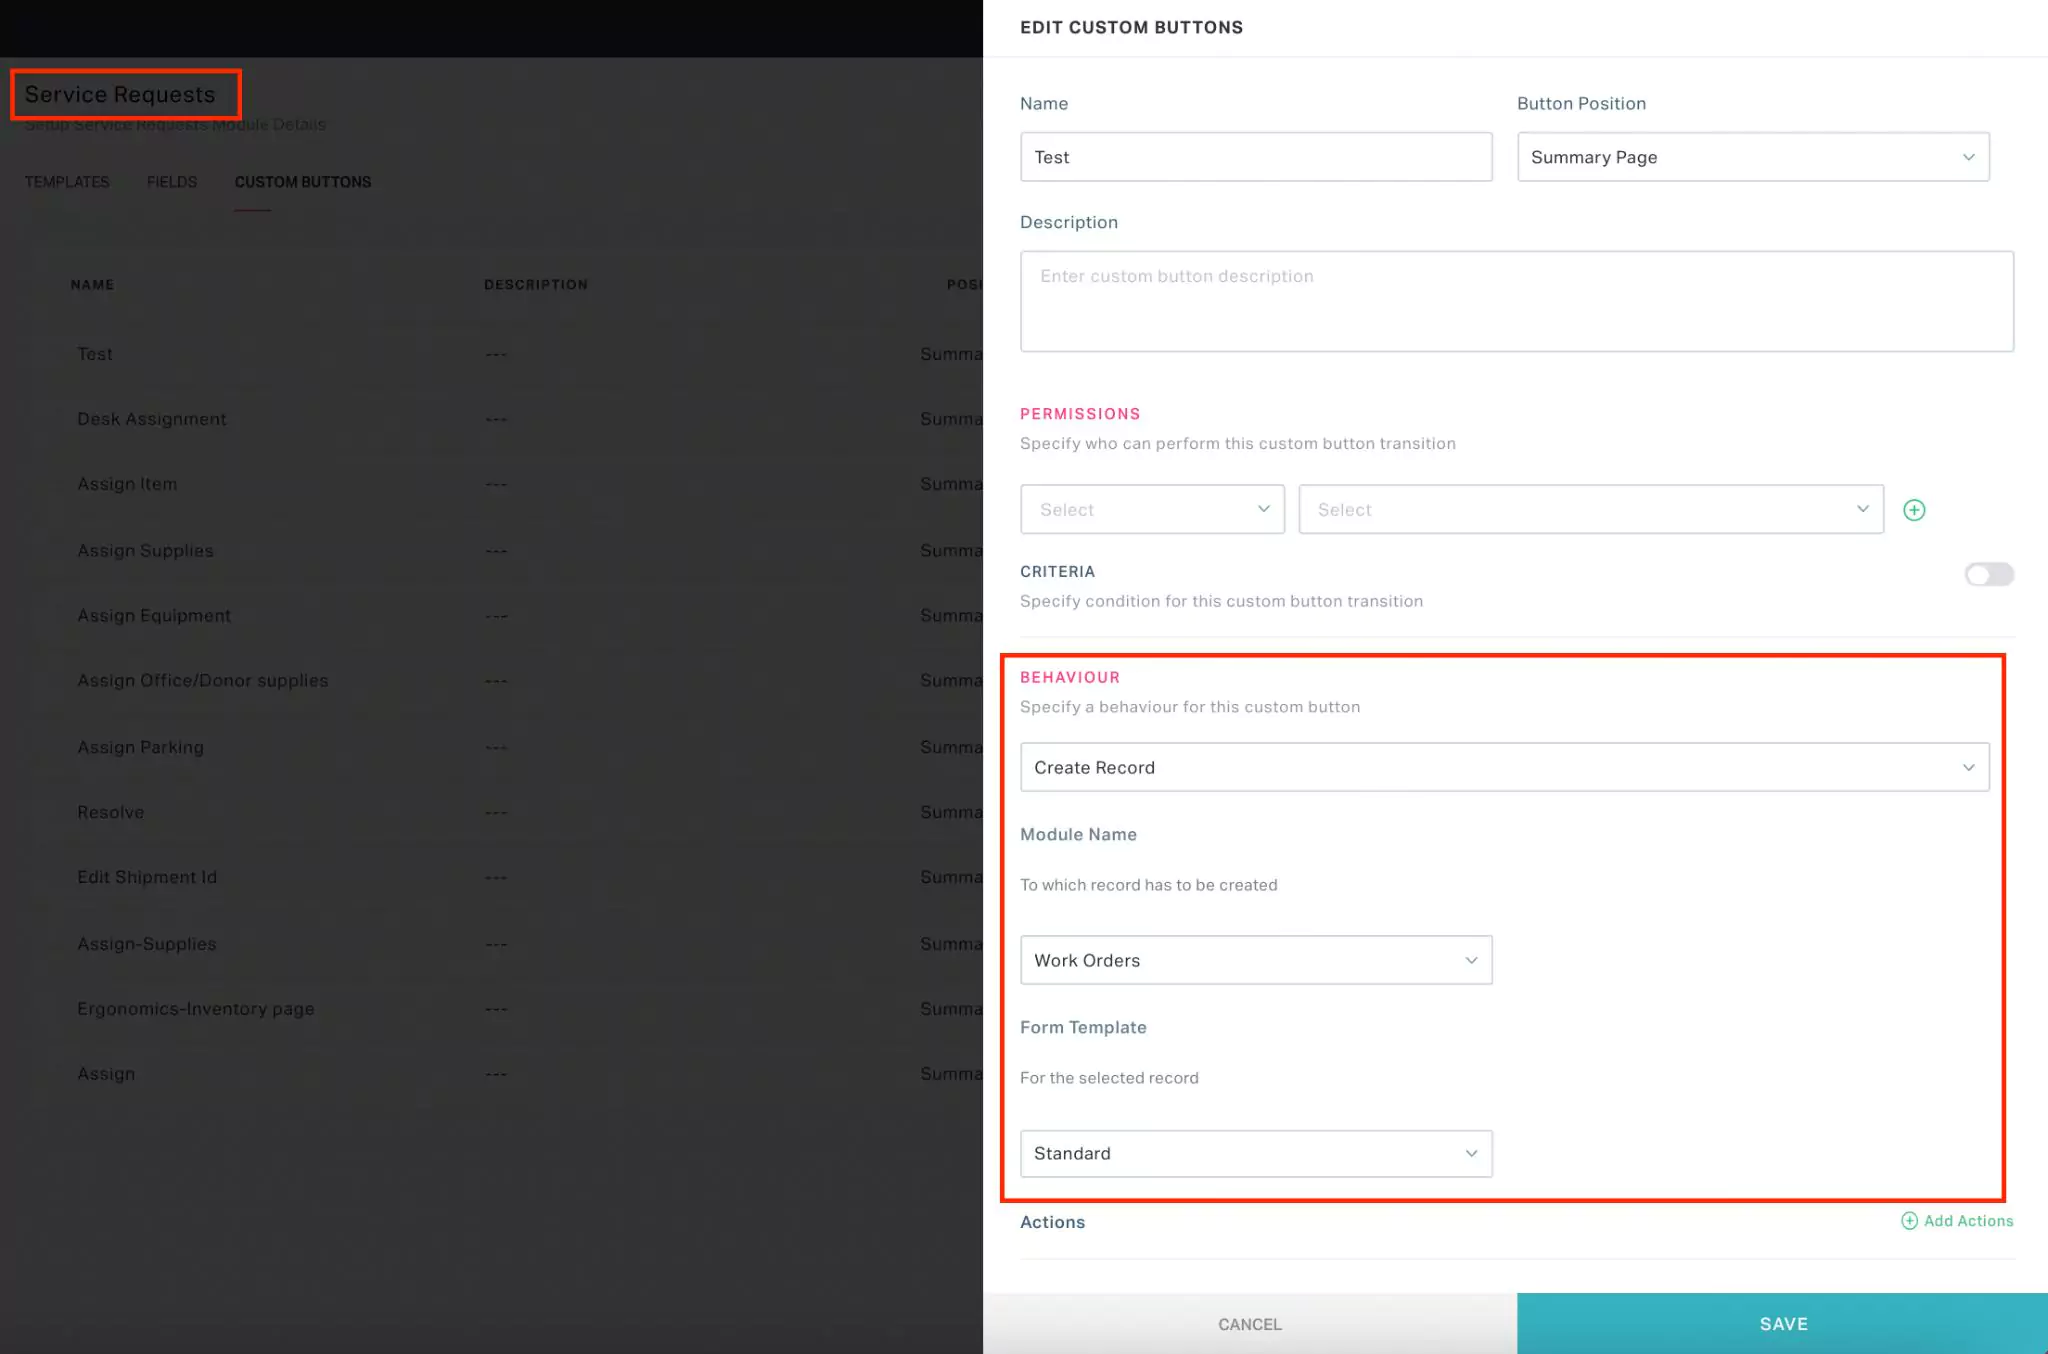
In the above scenario, a Test button will be displayed in the Summary page of the Service Requests module clicking which, the Standard form will be displayed. When you save the form, a new record will be created in the Work Orders module.
Update Record - To create a new record in the same module using a customized template.
When you click Configure in the below screen, you will be prompted to select the fields to build a form after which you will be directed to the form builder screen, where you can customize the form further and apply the required rules. Read the Managing Templates section for more information.
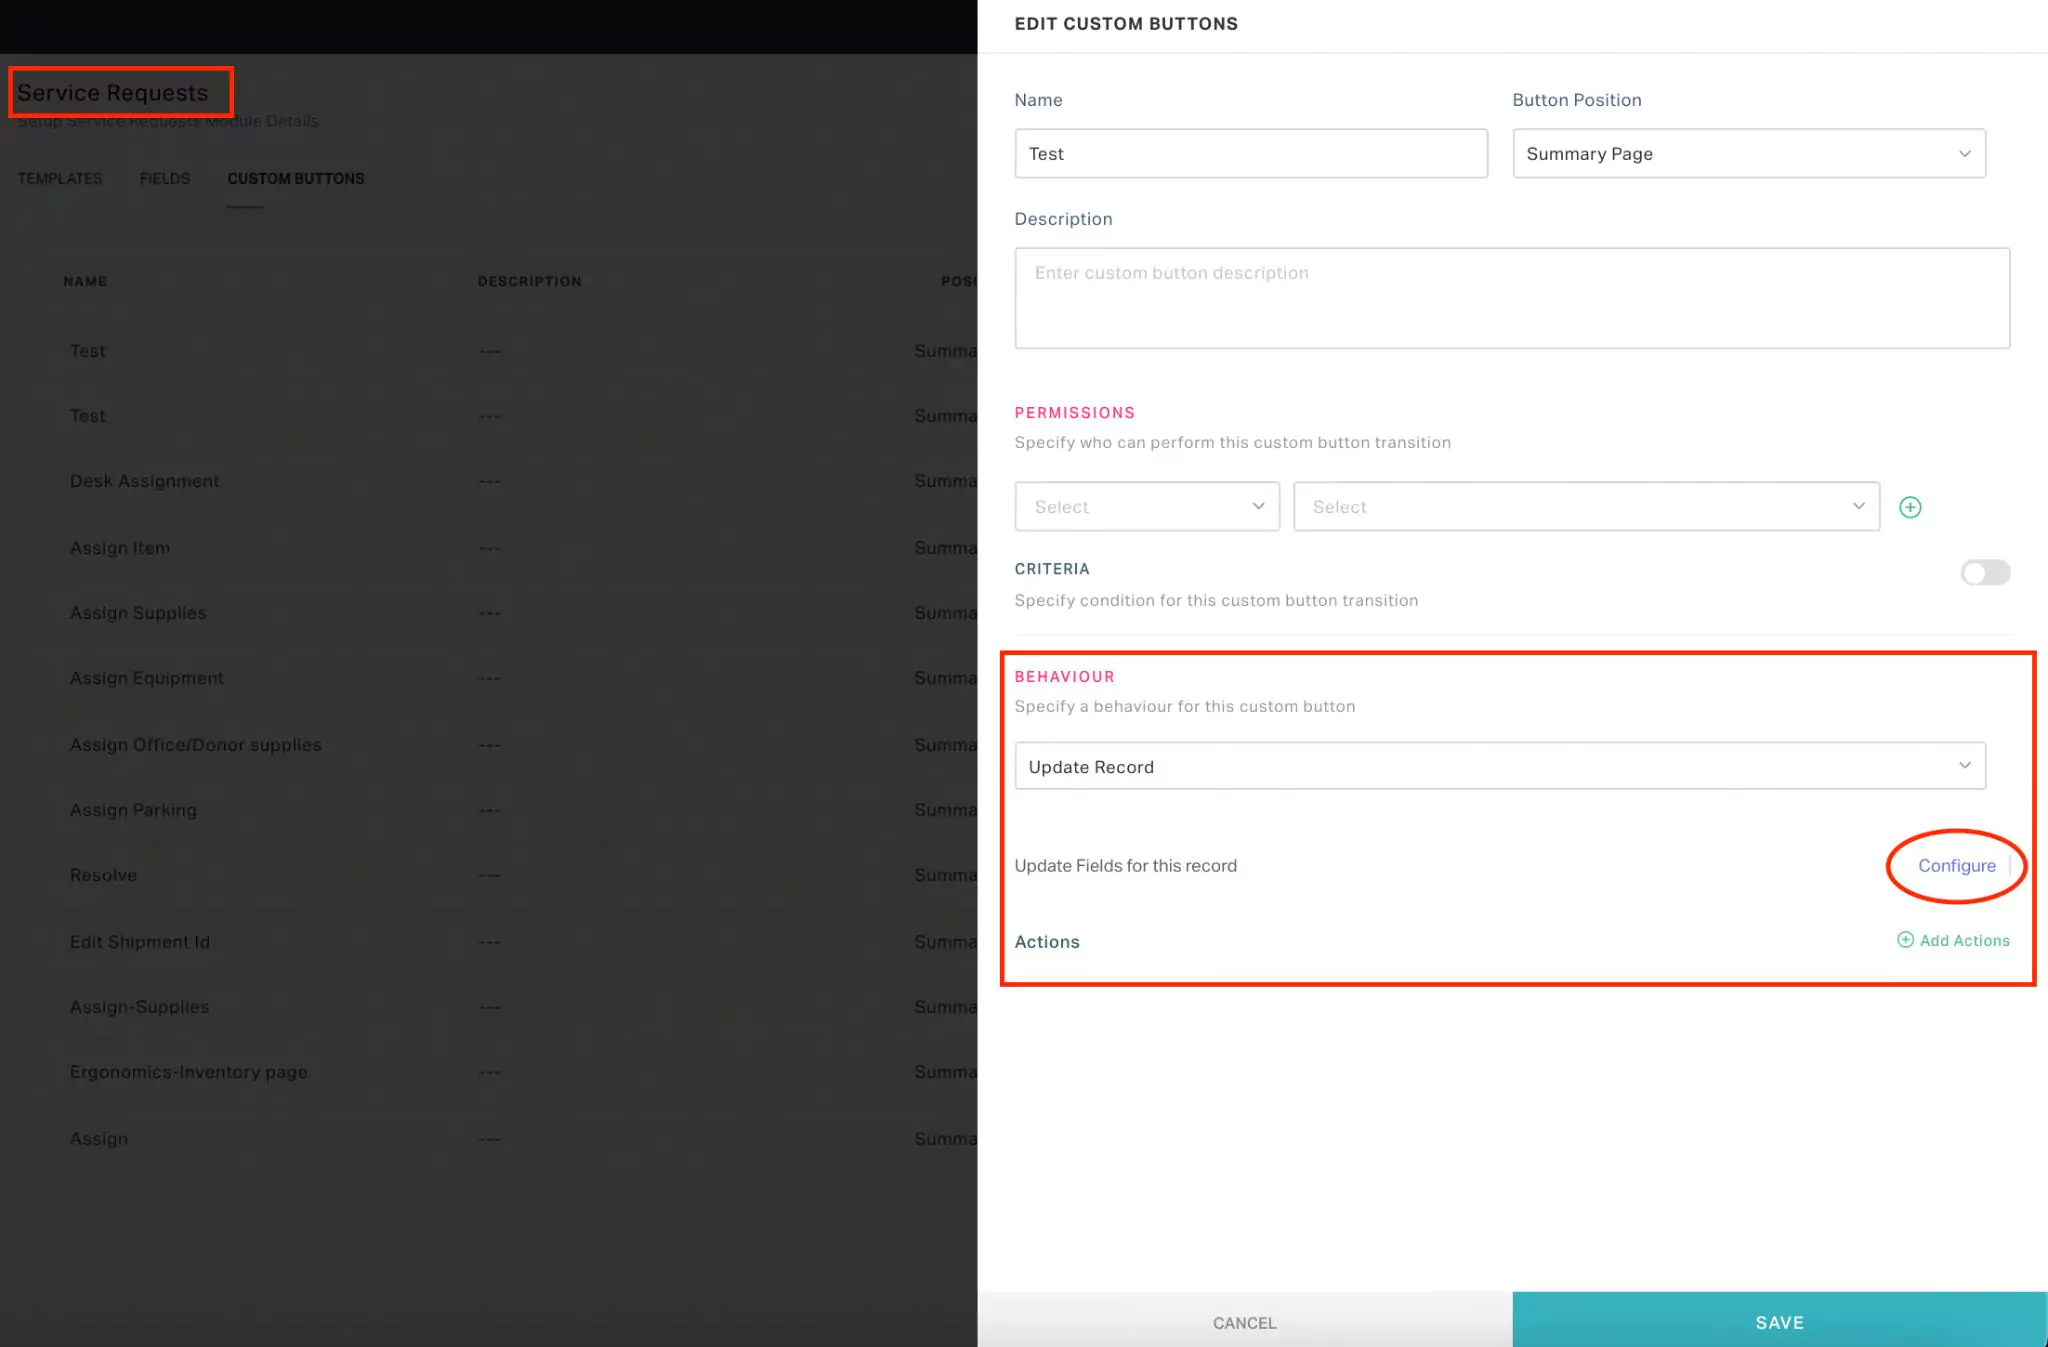
In the above scenario, a Test button will be displayed in the Summary page of the Service Requests module clicking which, the customized form that you created (with selected fields) will be displayed. When you save the form, the field values that you updated in the form will be updated in the record.
Redirect URL - To navigate to the required pages in other modules (for example, to load a form from another module).
You can specify the URL to which the user must navigate on click of the button. Also, you can configure certain fields to be auto-populated on form load as shown below.
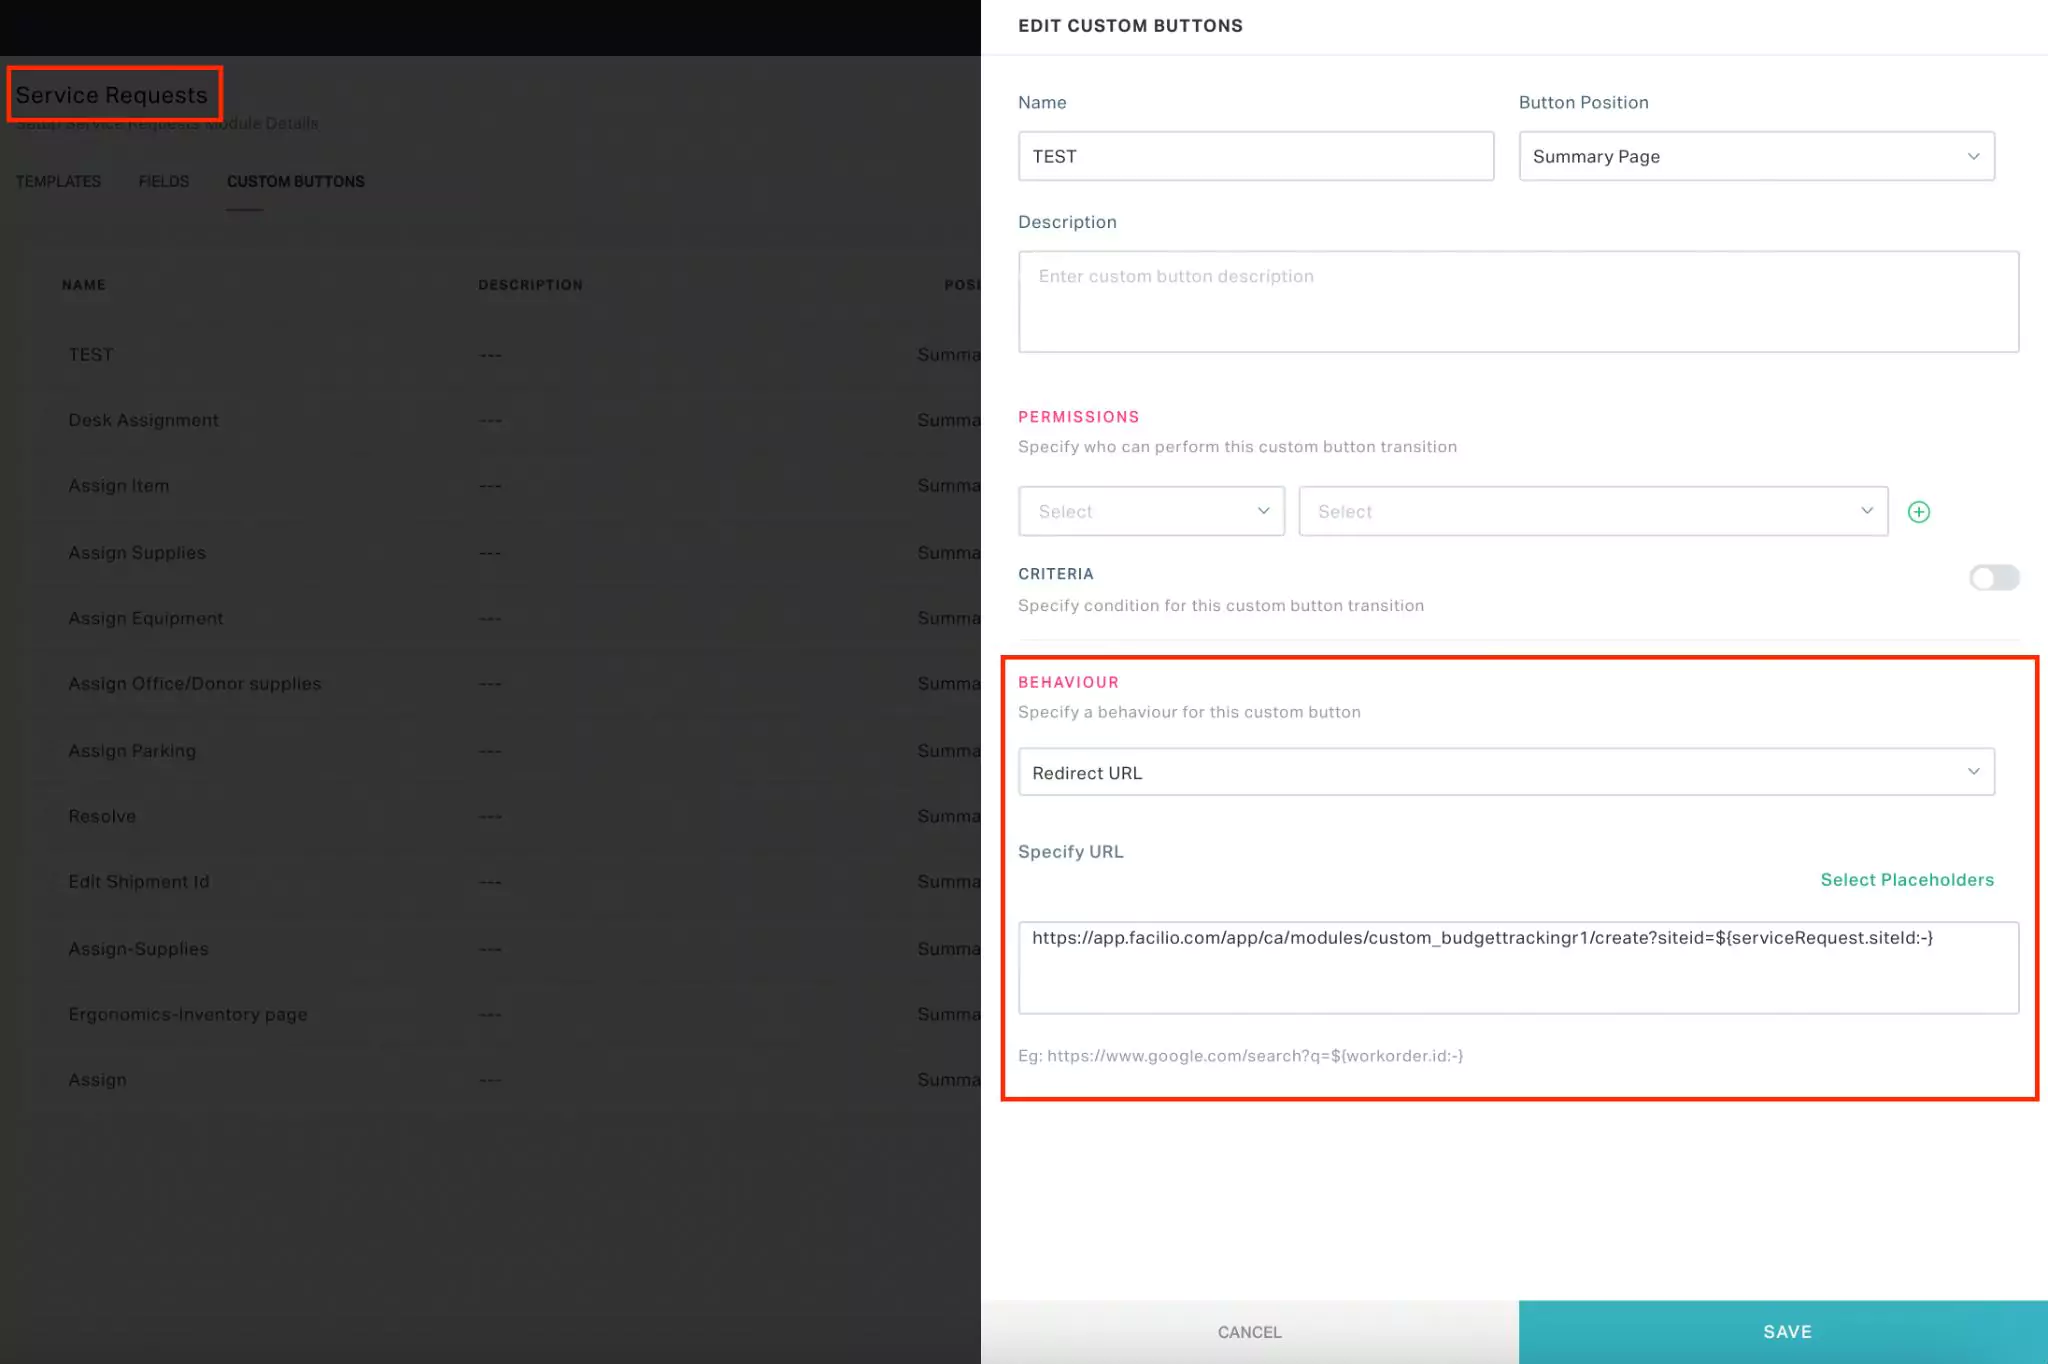
Syntax:
\<Redirection URL>?\<Field Link Name1 in New Module>=\<${ExistingModule.FieldLinkName1:-}>&\<Field Link Name2 in New Module>=\<${ExistingModule.FieldLinkName2:-}>...
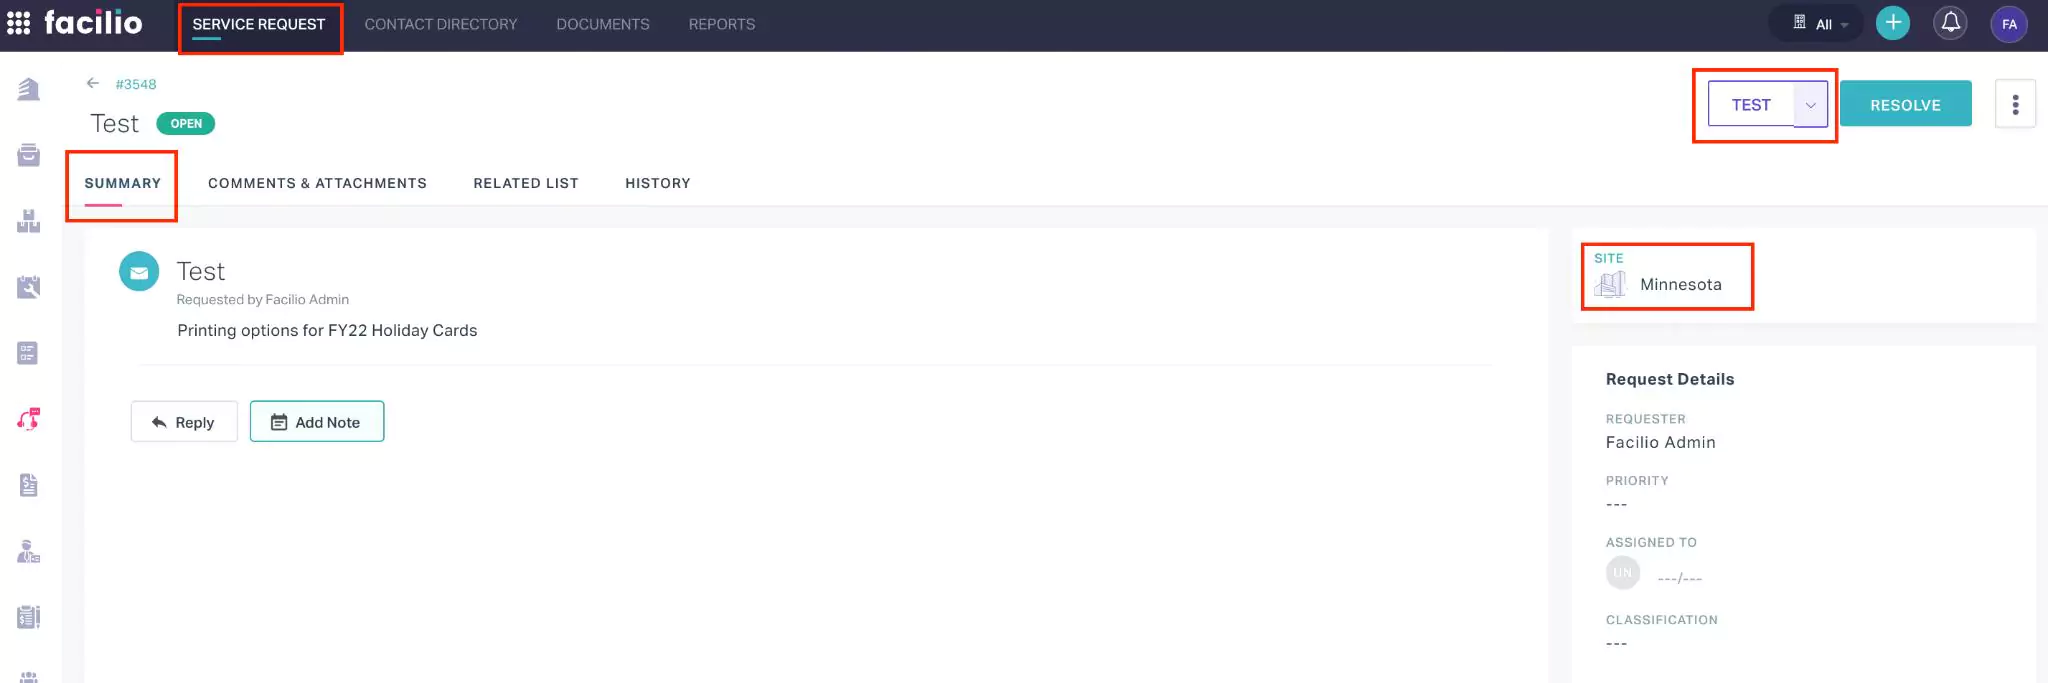
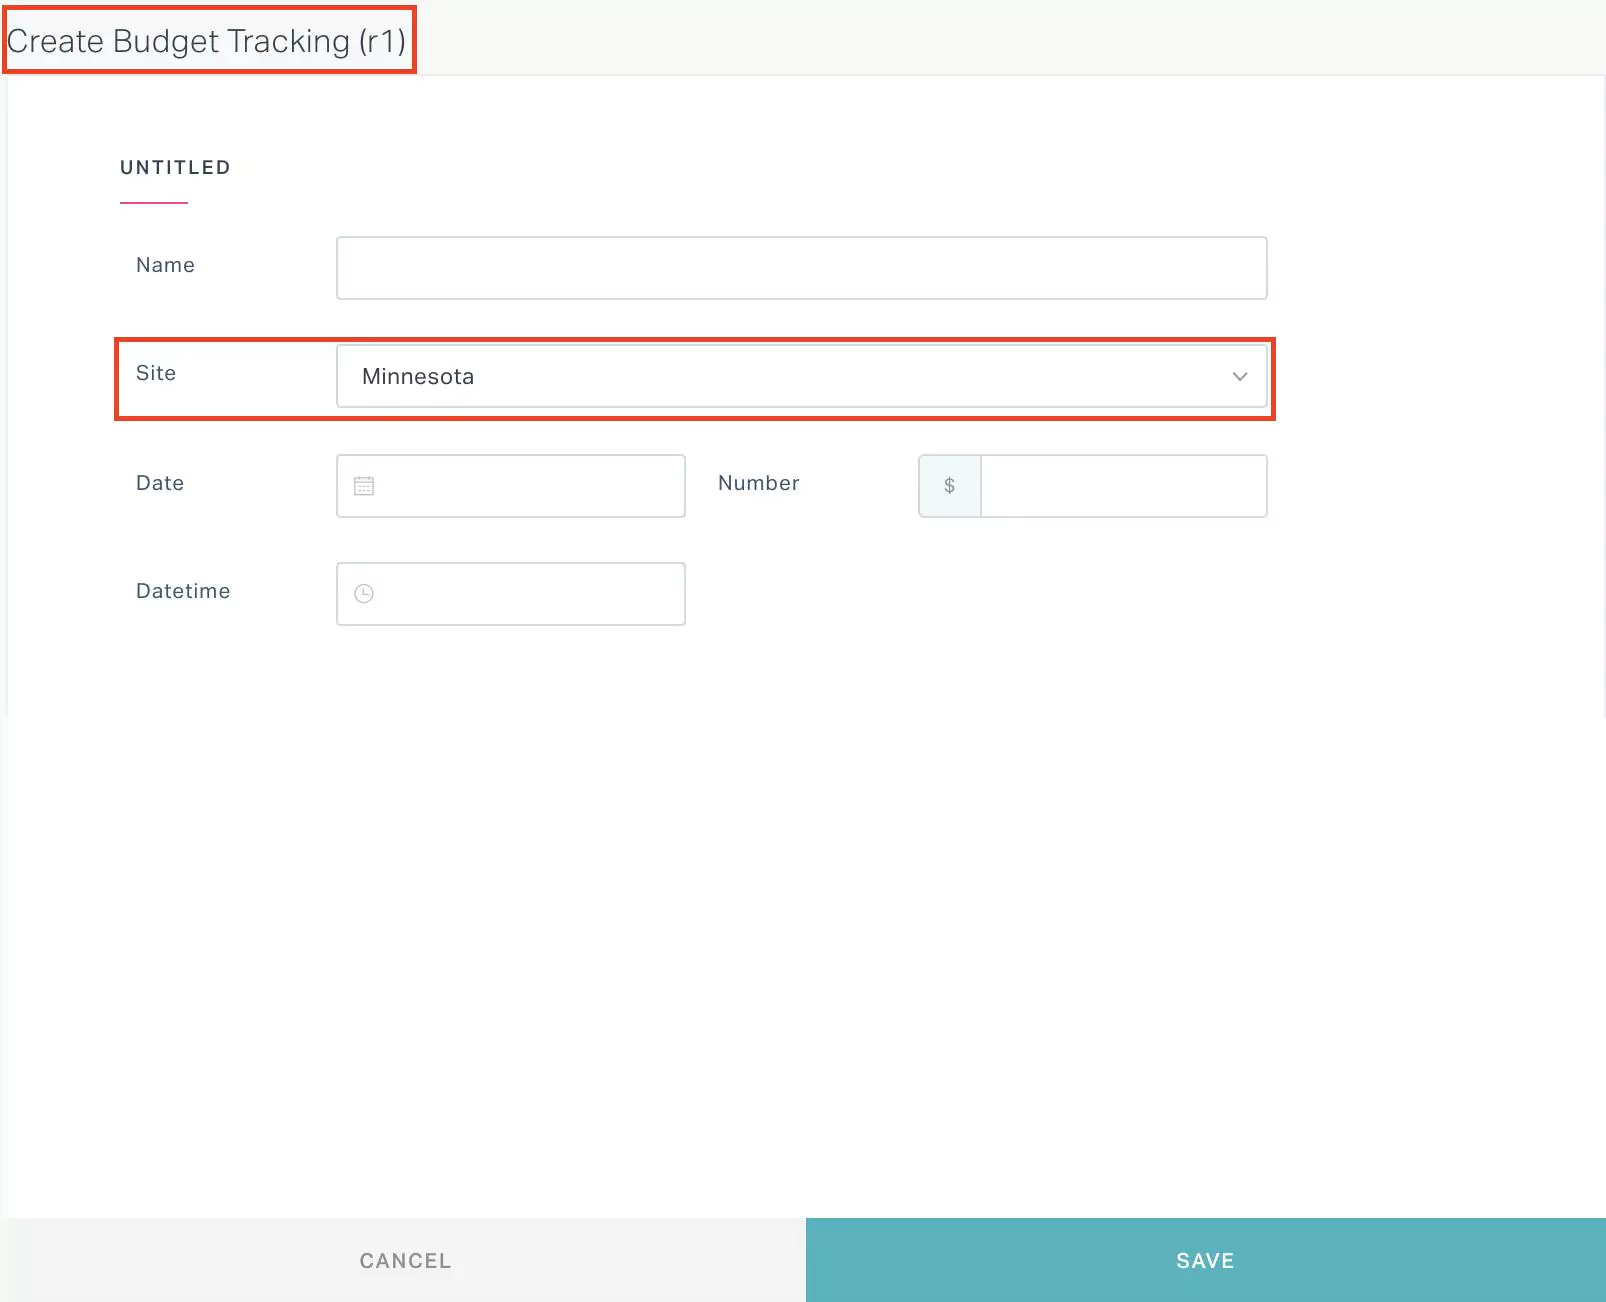
Note: You can use the Select Placeholders link to map the selected field values in the existing module to the similar fields in the redirected or new module.In this scenario, a TEST button will be displayed in the Summary page of the Service Requests module clicking which, the form specified in the URL (that is, the form in the custom module 'Budget Tracking R1') will open up with the Site field auto-populated with the site specified in the record in the Service Requests module as shown below.
Other Actions - To configure other actions to be executed on click of the custom. Read the Configure Action section for more information.
Configure Action
In addition to the general behavior, you can also configure other actions to be executed on click of the button.
Click Add Actions and select any of the following options:
Send Email - An email is triggered to the configured list of users
Send SMS - A text message is sent to the configured users on their phone
Send Mobile Notification - A push notification is triggered to the configured users on their phone
Execute Script - The configured script is executed on click of the button. Read the Script Guide for details on working with scripts.
Field Update - The value of the selected field is updated to the configured or defined value, on click of the button
Example: A sample scenario is shown below.Here, on click of the custom button, the Approval Status of the selected record(s) will be updated to Closed.