Configuring Survey Settings
Conducting surveys helps improve the products and services by making customer-centric decisions. It is crucial to carefully configure parameters of the survey functionality to make effective use of it. It includes choosing an appropriate survey template, defining the conditions for triggering the survey, specifying who can take it up and the actions to execute when the survey is triggered (such as sending an email), and more. The Satisfaction Survey section of this module allows you to set up these aspects for every survey created.
Let us consider configuring the survey parameters for the Work Order module. To configure the settings,
Select the Work Order module from the list of modules. The list of configured rules, appears as shown below.

Click CONFIGURE RULE at the top right of the screen. The New Survey screen appears.

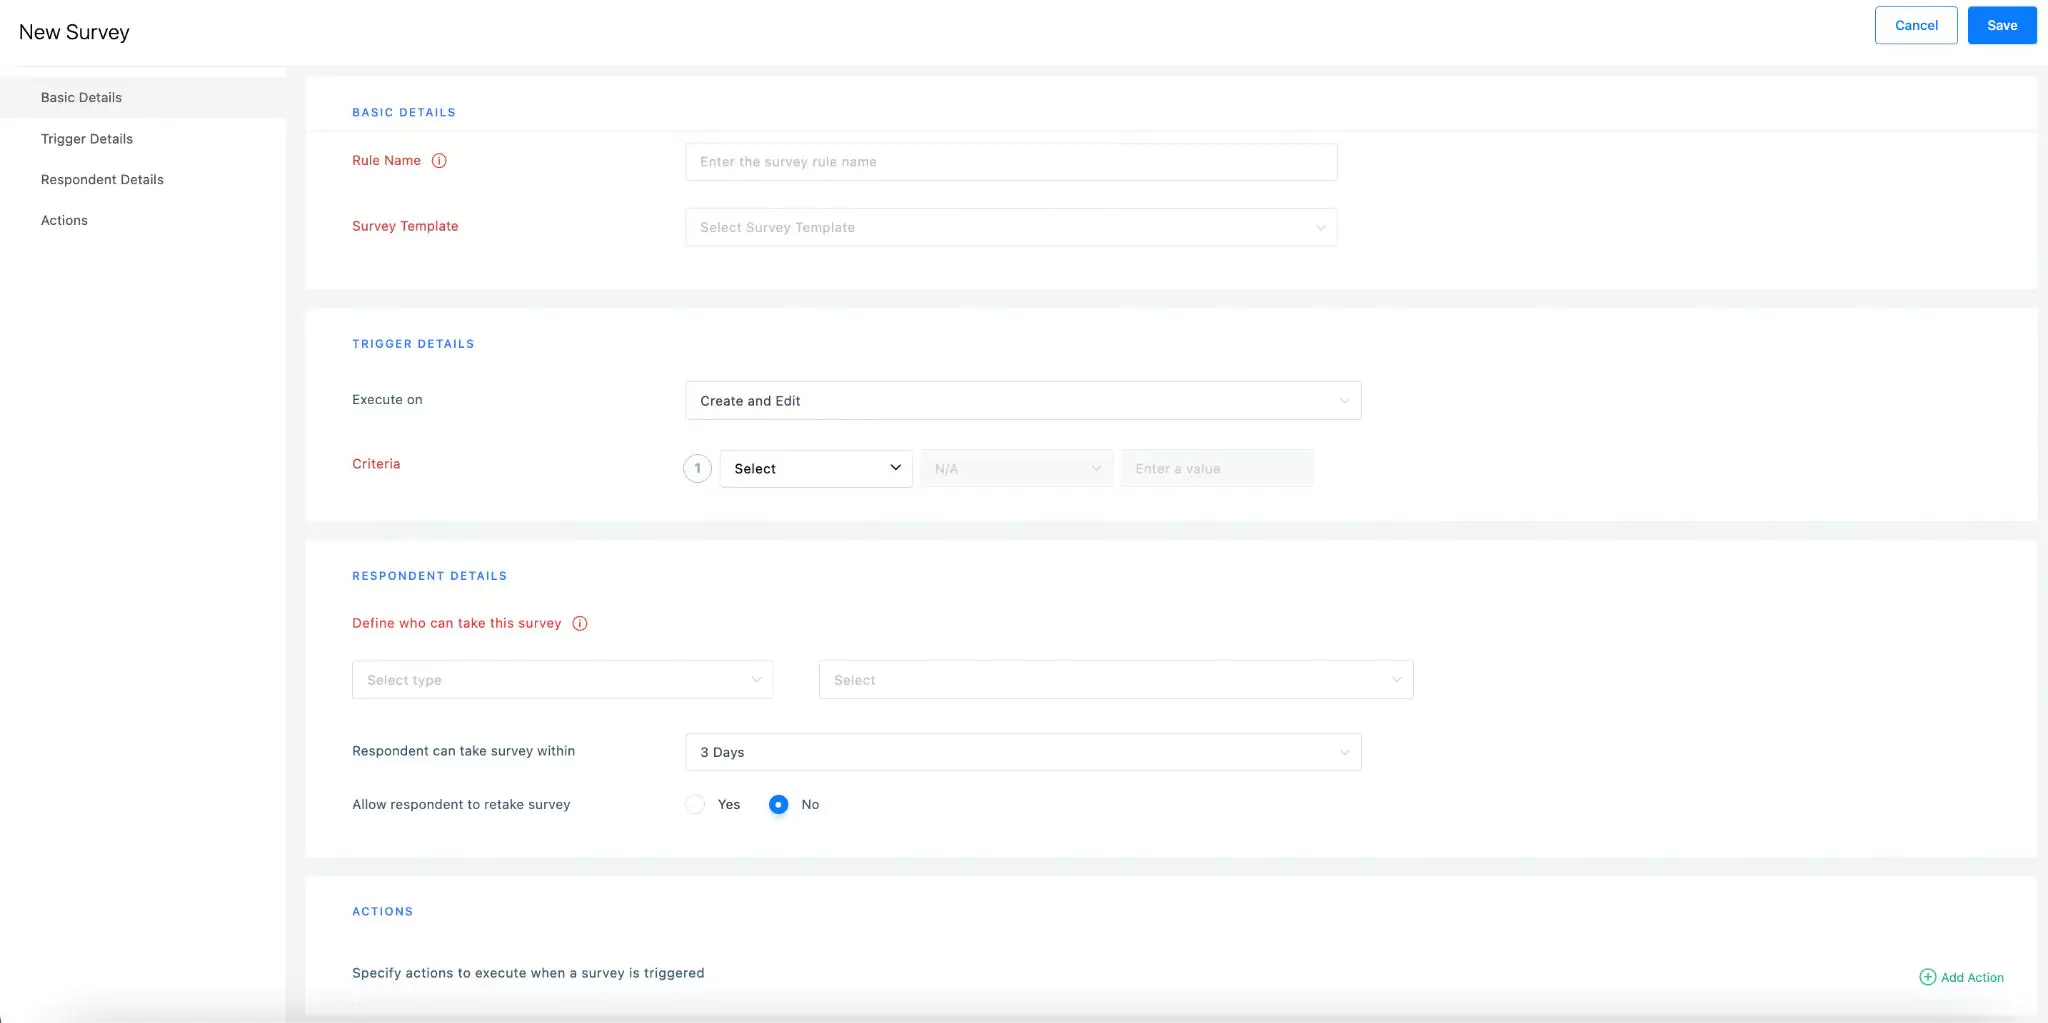
Configure the survey settings (as illustrated) in the following sections:
Basic Details
A survey created becomes active only when its respective settings are configured. The elementary requirement for a survey rule is defining for which template it applies. The survey details include defining,
Rule Name - A label to identify the survey settings being configured.
Survey Template - The survey for which the settings are being configured.
Note: This field displays the list of survey templates created in the Survey Template module. You can select the preferred survey from the drop-down list.
Trigger Details
Next it is important to define when the survey should trigger. In this section, you can define the action instance and conditions that trigger a survey.
Execute On - The action at which the survey should trigger.
Example: If this field is set to Close, the selected survey is triggered when a work order is closed.It is to be noted that you can use the,
- On Date option to schedule the survey to trigger based on any date field.
- Field Change option to trigger survey if the selected field(s) is/are modified. You configure field change for a maximum of three fields at once.
Criteria - The condition(s) on which the survey triggers for the selected action.
Update the following fields to complete the criteria configuration:
Field - Select a field on which the condition is to be applied.
Note: The values in the drop down list are the fields corresponding to the Work Orders module.Operator - Select the operation or comparison methodology to be applied.
You can choose any of the following possible operators:
- Is empty
- Is not empty
- Is
- Isn't
- Role is
- Date related operators (like, Yesterday, starting tomorrow, last month, this week and so on)
- Numeric operators (like, !=, >=, >, between and so on)
- String operators (like, contains, starts with, ends with and so on)
Note: The operators displayed vary with respect to the field chosen.Value - Enter the field input for which the condition applies.
Note: The applicability of this field depends on the operator set. For example, if the operator is set to 'Is empty' this field is not applicable.
A sample criterion configuration is shown in the screenshot below.
Here, the survey is triggered only for the records whose Subject is not 'Test'.
The criteria created are specific to the selected action. You can use the and icons to add or delete a record in this section. In case of multiple criteria, you can choose to match all or selected criteria by switching between AND and OR operators, respectively.
Respondent Details
Respondents are typically the people who respond to a questionnaire. This section allows you to configure the respondents for the selected survey. You can specify the respondent name directly or configure the application to pick the respondent from a particular name field.
You can configure the respondents upon choosing any of the following options:
User - Allows you to choose the person from the list of options displayed, to whom the selected survey should trigger.
Field - Allows you to choose the name field based on which the application picks the respondent.
Example: If this field is set to Requested By, the person who raised the request should respond to the survey.
Another prominent survey setting is defining the expiration. This section also allows you to configure the duration within which the respondent must answer the survey. In addition, you can specify the grace period to retake the survey in case you wish to let the user modify the responses. If you set the Allow respondent to retake the survey field to Yes, you can define the number of extra days the survey link must be valid, as shown below.

As a result of the above settings, the survey is available for six days for the user to respond and modify or retake it.
Actions
Generally, it is recommended to have the user(s) informed about the critical events of the survey execution process, promoting response rate and transparency. This section allows you to configure sending emails when the survey is triggered. You can use the Add Action link in the screen below to configure the details required to send email.
Read the Utilizing Email Templates section in the Email Template feature to understand how to configure the details in the SEND EMAIL ACTION screen that appears.
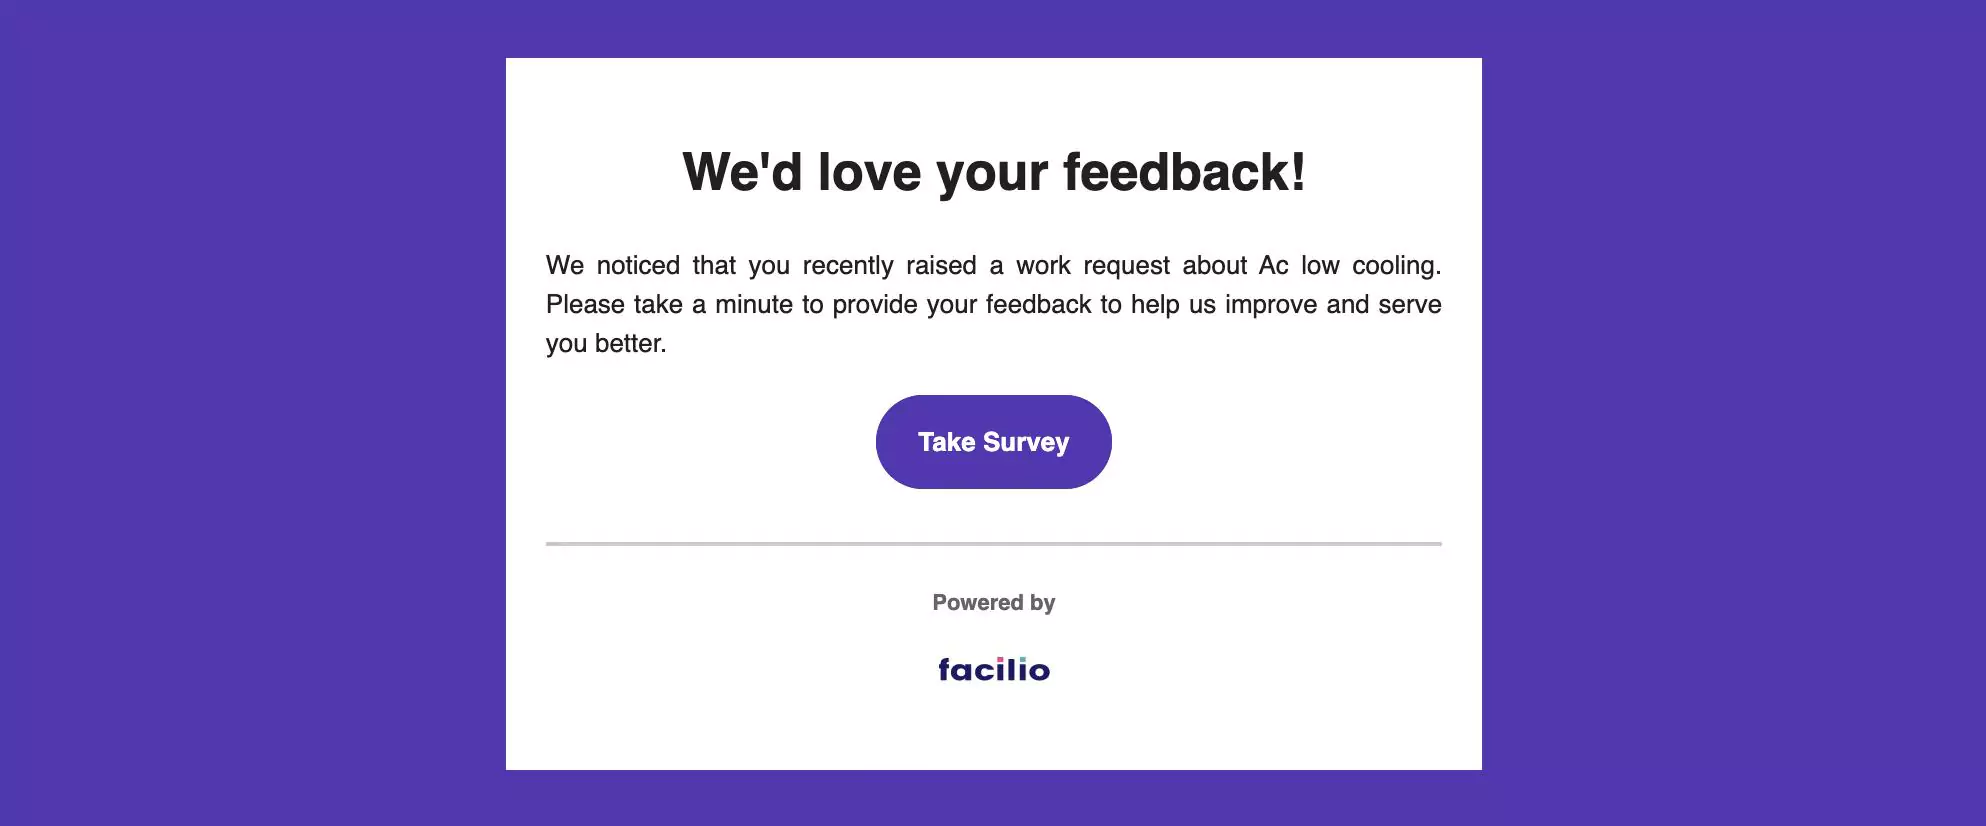
A sample notification email sent upon the trigger of the default 'Customer Satisfaction Survey' is shown below.

Click SAVE. The configured survey settings are now successfully saved as shown below.

You can use the toggle button to enable/disable the corresponding survey settings.